Follow my blog with Bloglovin

What I ate for dinner this week

>> February 24, 2013


I don't post here nearly enough, so I thought I might beef up the blog with a quick run down of our weekly din-din's. 


What do you think?


Simple and easy enough, just grilled bratwurst with a smattering of mustard and crispy cold sauerkraut. I picked up the sauerkraut at my local farmers market where they make it in-house, but the bagged kraut at the grocery store isn't too bad. Just make sure to avoid the canned stuff...ick!

Grilled Lemon Chicken with Charred Corn Salad. The chicken was literally as it sounds...marinated in a little lemon juice with olive oil and grilled. The corn salad was the highlight of this meal, my husband went back for seconds and I later caught him scraping the last bits out of the bowl. Needless to say, I'll be making this again soon. 
Thai Larb. I make variations of this same dish but this was my first time trying this particular recipe. We liked it, but I'll make some adjustments the next time around. I made it with ground turkey because it's what I had on hand, and I'll add chopped nuts for more texture. OH...and shortly after this photo was taken this was slathered in sriracha. Sriracha makes everything better...didn't you know?
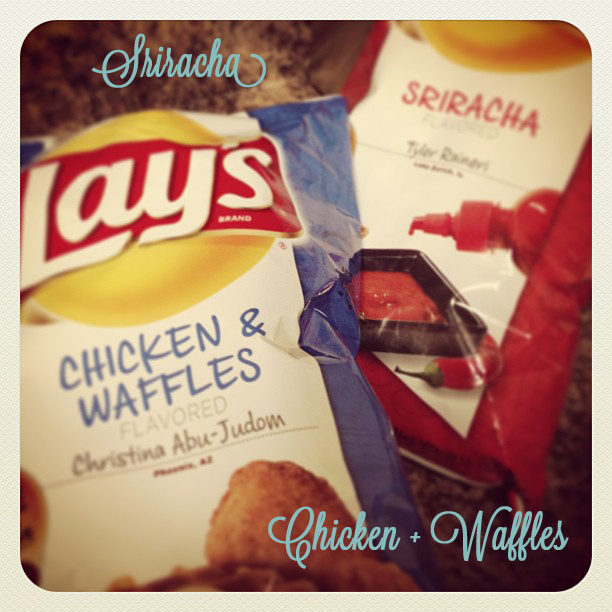
Chips do not a meal make, and no...we didn't eat this for dinner. BUT these little chippies were a satisfying pre-dinner snack. Chicken + Waffles and Sriracha are two of the limited time Lays flavors that were submitted during their "Do Us A Flavor" contest. I think the Sriracha flavor has the best chances of winning, but they were both fun to try!
                                       

This is also not something we ate for dinner. I'm still getting used to remembering to take photos of what we eat before we dive in. However, this doughnut is notable because it haunts my dreams. No really. I have a difficult time articulating how wonderful it is. It's from a local doughnut shop in Atlanta called Dutch Monkey Doughnuts. If you're even remotely local, let me first say that it's way out in the burbs but I would still suggest paying them a visit. I'll never look at doughnuts the same way again. Their lemon meringue is my favorite with it's not-to-sweet lemon filling and wonderfully silky meringue topping. Ugh...I'm dying just typing about this. 
     

So that was a snapshot of what we had this week! Did you have a notable meal?


Read more...

Nectar of the Gods

>> November 14, 2012


I just want to be clear. I cannot be held responsible for any behavior that ensues after consuming this devilish liquid. 

I also have a confession to make. I've recently come to the realization that caramel...specifically salted caramel is without a doubt one of the single best foods on this planet. Chocolate doesn't even have a chance against this stuff. Burnt sugar, is like... totally my jam. 


I made this highly addictive delicious concoction only to go one step further. I'm responsible for bringing a dessert to a friends-giving dinner tomorrow night so...of course, I've done the unthinkable.


I made it into a cheesecake. That's right. A salted caramel cheesecake. #IDie. I don't even know what to do with myself. Except to tell you to make this as soon as possible and remember the most important piece of advice...don't share with ANYONE! Ok fine, make this for your real Thanksgiving and share with all of your friends and family. They'll forever invite you to all of the coolest parties and swankiest of gatherings from now until eternity. Just remember, you heard it here first.

Salted Caramel Sauce
Adapted from a thousand different sources...so I'm claiming this one

1 1/2 Cup Sugar
5 Tablespoons of Water
5 Tablespoons of Light Corn Syrup
1 Cup of Heavy Cream
5 tablespoons of Butter (cut into chunks)
1 teaspoon of Kosher Salt
1 teaspoon of Vanilla Bean Paste (or Pure Vanilla Extract)

Combine Sugar, Water, and Corn Syrup in a small saucepan and stir until combined. Bring to a boil over medium heat, only swirling the pan as the mixture heats. 

Once the sugar has browned to a medium/amber color, remove the pan from the heat. Add in the cream and butter (mixture will sputter and foam) and whisk until combined. You may have to put the pan back on the burner to get the caramel completely smooth. 

Add in the salt and vanilla, and stir to combine. Let this sit for at least 24 hours in the fridge so that the caramel flavor develops.


Read more...

Tomato Soup for the Soul

>> October 10, 2012

Seriously? Why does chicken soup get all the glory? There are few things that a piping hot bowl of tomato soup and a grilled cheese can't fix. 


Now that Fall has officially arrived in Georgia, it's finally appropriate to start pulling out the cozy sweaters, warmer recipes, and (dare I say) boots?!?! I'm super pumped that it's Fall, not only because it's my favorite season but because I love the sense of renewal that comes along with each season. Inevitably, by the time each season comes to a close we are so ready to move on that any change in temperature is cause for a mini celebration. 


These days, I've been eager for a little change in my life. With Josh graduating school, we've closed a chapter in our lives and the next chapter is waiting in the wings. Of course there's excitement that comes with new opportunities, as well as uncertainty about what's around the corner. Not to worry...before my excitement gets out of control my anxiety swoops in to make sure I don't get carried away. You know that saying "the only thing that's certain is death and taxes", well it should be "the only thing that's certain is death, taxes, and Carolyn's anxiety".


At any rate, here's to a new season and new beginnings!

Tomato Soup
Adapted from: Smitten Kitchen
1 28oz Can Whole Tomatoes
1 Tbs Brown Sugar
2 Tbs Butter
1 Large Shallot, Minced
1 Tbs Tomato Paste
1 Tbs Flour
1 Cup Chicken Broth
1/3 Cup Milk (or Cream if you'd like to add richness)


Pre-heat the oven to 450°F and line a baking sheet with aluminum foil. Set a strainer over a bowl, and cut the tomato's in half and remove the seeds. Make sure you retain as much of the juice as possible! We're just trying to get rid of those pesky seeds! Spread the tomato half's on the baking sheet and sprinkle with the brown sugar. Roast them in the oven for about 30 minutes until most of the liquid has evaporated. Pull them out of the oven and set them aside to cool.


Melt the butter of medium heat until foamy and add the tomato paste and minced shallots. Reduce the heat to low and cook the shallots for 7 - 10 minutes. Add the flour and cook until completely incorporated. Gradually start to add the chicken broth and whisk constantly until all of the broth is combined. Add the tomato juice and the roasted tomatoes and bring to a boil. Once the soup reaches a boil, reduce to a simmer and cook for about 10 minutes. 

Pour the soup into a blender (or use an immersion blender) and blend to make the soup creamy! Add the soup back to the pot and add in the milk (or cream) and cook for another 5 minutes. 


Read more...

San Francisco Travel Guide: Part 1

>> October 7, 2012

I sat down to write this and quickly realized that I needed to break this up into two posts...there’s just too much here to cram it all in at once. Evidently my gift of gab has returned.


I’ve had the good fortune of visiting San Francisco a boatload of times. Because of my job I’m there at least once a year and I’ve been several times for pleasure. It is by far, one of my most favorite cities. This is mostly in part because of the food culture (it’s unreal), but the vibe and climate are pretty stellar as well. Recently, I’ve had several requests for things to do/restaurants to visit in the Bay Area so I thought I’d construct a “To-Do/How-To” SFO style.


The one thing I think most people are surprised by when they visit San Fran is the climate. Seemingly the misconception is “it’s sunny California...it’ll be warm”, but this is almost never the case. They have a pretty moderate climate year-round, but the the average high temperature maxes out at 72 degrees and the low bottoms out at a whopping 46 degrees. It’s definitely cooler than you might assume, but a far cry from being considered “cold”.

Ok, onto the good stuff. What to do when you’re in the Bay Area! For starters...there’s quite literally tons of wonderful things you can do to spend your time, here are just a few of them: 


Golden Gate Bridge & Presidio Park: Ok, I’m starting with the obvious, but crazy tourist’s aside it’s wonderful to see and offers fantastic views of the city.


  • I wouldn’t be a good steward of the National Park system if I didn’t remind you to get your Passport stamps at the Golden Gate Bridge gift shop.
  • Make sure to stroll over to the old Battery West (on the Pacific side of the bridge). The views are absolutely stunning of the city and Presidio Park
Alcatraz Island: Yet another obvious addition to the list, but still a fun activity. What could be better than visiting Al Capone’s old stomping grounds? With all the lore that this famous penitentiary holds, it’s certainly worth a few hours of exploration.
  • I’m leaving Fisherman’s Wharf off the list because it’s a bit of a 2-for-1. All of the ferries to Alcatraz leave from the wharf area, so you can stay and visit as long as you like. However, the wharf is super tourist-y and can be extremely crowded at peak times...not to mention that it’s incredibly cheesy...but you be the judge :)
Palace of Fine Arts: Visiting the Palace of Fine Arts is a pretty awesome way to spend the afternoon if you ask me. I learned of this place on my last business trip to SFO...a friend who’s local to SFO took me to explore the architecture. Architecturally, it’s nothing like anything else you’ll see in San Fran and surrounded by a wonderful little park. It was originally built for the 1915 World’s Fair, and was demolished shortly after the event. It was later brought back by popular demand and rebuilt in 1965, so the current building is actually a replica of what once stood.


Ferry Building Market: I could seriously go on, and on about the Ferry Building. It’s seriously my favorite part of San Fran. It’s full of restaurants and food vendors, but the best days to go are Tuesday, Thursday and Saturday to see the Farmer’s Market. The Saturday market is especially amazing...food vendors from all over the area come to display the most beautiful ingredients you’ve ever seen. It makes being in a hotel sans kitchen a cryin’ shame. My suggestion would be to grab some artisanal bread, local cheeses, maybe a little charcuterie from boccalone and a bottle of sparkling wine...find a little park and pop a squat for the best little lunch you could ever dream of.


For the sake of brevity, I'll leave you with those four "must see" places to visit when you're in the Bay Area. Lord knows, I could go on and on...but in my opinion, you'd be hard pressed to find better ways to spend your time in the city.

Next up...what to eat and where to stay...stay tuned!


Read more...

Grilled Clams

>> September 30, 2012

I'm a bit short on words this time around. Probably one of the few times a year that I'm not incredibly long winded. 

Untitled

At any rate, these grilled clams are absolutely delicious. I saw this recipe a few months ago in one of my food magazines and knew that I at least needed to try it. 

In absence of a fun little story wrapped around a great recipe, I figured I'd give you some tips on how to enjoy these little gems.


Untitled

  • Eat these for dinner after a lazy Sunday afternoon
  • Grill up some really (and I mean really) good bread with garlic and butter to go along with the clammies
  • Make sure you have a really nice, crisp white wine to sip along side the clam's.
  • Eat these outside on your deck, or back patio and soak in the last bits of the day
  • Make sure to use your grill for this entire meal...grilled clams, grilled bread, grilled vegetables. Perfect for the last hurrah of Summer.
Untitled

Grilled Clams

Adapted from: Bon Appétit 

1 Stick Unsalted Butter, at room temperature
1 Tbs Flat Leaf Parsley, Chopped
1 Tbs Chives, Chopped
1 Tbs Scallion, Chopped
1 Tbs Lemon Juice
Kosher Salt & Fresh Cracked Black Pepper
24 Little Neck Clams
Lemon Wedges

Combine the butter, herbs, and lemon juice together until well blended. Season with salt and pepper and set aside.

Scrub the clam shells to remove any excess grit that might be clinging to them. Set your grill, either gas or charcoal to a medium-high heat. Place clams directly on the rack and close the grill cover to cook. Cook for 6-8 minutes, the clams should have all popped open at this point (discard any that haven't opened). 

Transfer the clams to a platter, being careful to keep as much juice in the shells as possible. Dot the clams with the herb butter, and let stand until the butter melts. Serve with lemon wedges to add a bright splash of flavor!

Read more...

Family Traditions

>> June 23, 2012

So I sat down and wrote 99% of this post and saved it in draft format. Only to find out later that for some reason my "draft" didn't save and I was left with only the title. Enter sad pouty-face Carolyn. Sadly I don't remember what I said in my post. Like at all. I'm sure it was cleverly composed and teeming with wit, but alas...we'll never know.


Untitled

Anywho...I'm not going to try to recount what was written previously, but to simply state the main theme of this post which is as you might have guessed...Family Traditions. 


Untitled

I love traditions. Traditions are just memories that you have the opportunity to recreate, relive, and revive with new people in a different time. I love sharing experiences with other people and especially with my family.


My Dad and I made this ravioli one weekend while I was visiting home and it was such a cool experience. Although pasta making isn't traditionally something that I've done with my family, it has been a large part of my family. While my dad and I were cranking out sheets of fresh pasta dough, he was telling me stories of my 'Big Nonni' (my great-grandmother) and the pasta that she used to make for him. He remembered her kitchen counter being covered with all kinds of fresh pasta that she would roll out by hand. And he told me about the special way that she used to twist her thumb into a ball of pasta dough to make orecchiette (or-kee-yet-tee) and cavatelli's (cah-vah-teel's). 


Untitled


That's the good stuff...that's why I love traditions. It's getting to hear stories about my family's past and in a way, traveling back in time and getting to know my great-grandmother a little better. It's stories like these that remind me of where I came from, and let's me know that deep down inside I have a little of her in me.


I like to think that Big Nonni would have been proud of our ravioli adventure and this is definitely something that we'll be working into our future family traditions!


Fresh Pasta
Adapted from: Smitten Kitchen
3 Cups All-Purpose Flour
4 Large Eggs
1 teaspoon Kosher Salt
4 Tablespoons Water


*Requires Food Processor


Combine all ingredients in the bowl of the fo-pro (food processor) and blend until the dough just begins to form a ball (add water drop-by-drop if the dough is too dry). Process the dough for another 15 seconds more and transfer to a floured surface and let stand, covered with an inverted bowl for 1 hour.


Filling
16 oz Ricotta Cheese (full fat)
2 Cups Parmigiano Reggiano*, freshly grated
1/4 Cup Fresh Basil leaves, chopped
2 Tablespoons Italian Flat Leaf Parsley, chopped
1 Large Egg
Salt


Combine all the ingredients together and set aside


*It is SO important that you use the real stuff here...please make sure it's Parmigiano Reggiano and not domestic parm. you'll thank me later :)


Sauce
1 28 oz can Crushed Tomatoes
4 Cloves Garlic, chopped
3 Tablespoons Tomato Paste
1/4 Cup Red Wine


Heat Olive Oil over medium heat until shimmery, then add the chopped garlic and cook until brown (be careful not to overcook). Add the tomato paste (the mixture will sputter) and stir to combine with the garlic. De-glaze the pan with the red wine and simmer until the the liquid has almost completely evaporated.


Add the can of Crushed Tomatoes and let simmer over low heat for at least 30 minutes, but preferably and hour. Salt & Pepper to taste.


Assembly
Use a pasta roller to roll the sheets of pasta dough into uniformly thin long sheets. 


Once the pasta sheets are finished, lay half of them out on a work surface and drop tablespoon size dollops of the cheese mixture onto the pasta sheets about two inches apart from each other. Place the other half of your pasta sheets on top of the cheese mixture and press down to eliminate as many air bubbles as possible. Cut the pasta sheets into individual ravioli's with a pizza cutter or a sharp knife. Crimp the edges of the pasta with a fork to prevent the cheese from seeping out while cooking. 


Cook the ravioli's in salted boiling water for a few minutes (fresh pasta cooks much faster than dried) until the dough is al dente. 


Pluck the ravioli's out of the water with a slotted spoon and cover with sauce so that they don't stick to each other. 


Read more...

Breakfast: Easy Peasy Style

>> June 2, 2012

Dutch Baby Pancake


So the deal in my household is that we LOVE breakfast. The problem with this is that we're not the type that is inclined to jump out of bed a cook a big breakfast complete with pancake, eggs, bacon, fruit, etc. We're the type that is more likely to start the coffee and then starve to 11:30 until we're forced to eat lunch. 


I know it makes no sense, but this is the way that it is. We're morning-ish people...we're awake, and that's about the extent of it.


Dutch Baby Pancake


You can imagine my elation when Josh discovered a recipe that allows you prep the night before with minimal steps. Not to mention the fact that said recipe is a pancake! I mean really, I've never met a pancake that I didn't like.  


This is seriously the easiest recipe on the face of the planet AND it's delicious. I have to admit one of my favorite things about dutch baby's is the poofiness. It's so wonderful and makes you just want to dive into the airy, poofy, wonderfulness.


Dutch Baby Pancake


Aside from all of it's inherent amazing-ness is the fact that it's super adaptable. There are so many ways that you can transform this pancake, that I can't even begin to tell you. You could go all traditional and top with butter & sugar. You could go the fruit route and top it with wonderful berries, lemon juice, or tropical compote. This morning we opted for simply dusted powdered sugar. Either way, it's amazing.


Dutch Baby Pancake
Adapted from: Leite's Culinaria

2/3 Cup Milk
1/4 teaspoon Vanilla Bean Paste (or vanilla extract)
4 Large Eggs
2/3 Cup All Purpose Flour
2 teaspoons Sugar
1/4 teaspoon Kosher Salt
1 1/2 Tablespoon Butter, melted


Combine milk, vanilla bean paste, and eggs in a blender and blend for 15 seconds.


In a separate bowl, combine flour, sugar and salt and mix to combine. Add the flour mixture to the blender and blend until just combined.


Add the melted butter to the blender and blend for 30 seconds. Pour the batter back into the mixing bowl, cover tightly and refrigerate over night.


**In the Morning**
Pre-heat the oven to 400 degrees, and make sure the rack is in the middle of the oven. 


Butter a cast iron skillet (or oven proof skillet) and place in the oven for 5 minutes to get it really hot.


After the skillet has been heated, pull it out of the oven and pour the batter into the pan. Bake for 15 minutes, then turn the skillet 180 degrees and bake for another 10 minutes until the pancake has risen high on the sides and is golden in the middle. 


Pull the dutch baby out of the oven and slide it right out of the pan and onto a plate. Serve/top with whatever accoutrements you so desire.


Happy Breakfast!

Read more...

  © Blogger template Simple n' Sweet by Ourblogtemplates.com 2009

Back to TOP