Follow my blog with Bloglovin
Showing posts with label easy. Show all posts

Sum-Sum-Summer time

>> June 5, 2013


I just love the beginning of Summer. There is something about the start of a new season, the excitement of things to come. The changing of seasonal produce, amazing foliage, new wardrobes, and dreams of wonderful new locales that lend themselves to the changing temperatures. So I guess I should say that I love the beginning of every season...it's true, I really do. It's been an entire year since I've had good tomatoes, seen pretty sandals and smelled sweet jasmine...and I'm pretty stinkin' excited about it!

These last few weeks (in between the thunder storms) have been so wonderful! I always forget how amazing the sun and warmth feels on my skin, and every year on my first pool outing I think: "OMGAHHH this feels so good".  

Strawberries are also something to get excited about. They're so gorgeous and they're the perfect fruit to usher Summer into season. Two weeks ago Josh and I managed to hand pick and cart off two gallons of fresh strawberries from a local farm. They're my most favorite strawberries, and I had about a zillion recipes that I wanted to make with these little babies. This past weekend I was tasked with bringing dessert to a dinner with some friends and I had the worst time deciding what to make! 


Finally, I decided on these little sammich's! They're so super simple and require no cooking whatsoever...which also lends itself to the recent rising temperatures. We enjoyed these so much with our friends and I hope you guys do too!

Do you have any favorite summer traditions? 

Strawberry Ice Cream Sandwiches
1 Half Gallon Vanilla Ice Cream, softened**
1 pint Strawberries, chopped
Graham Crackers, broken in half

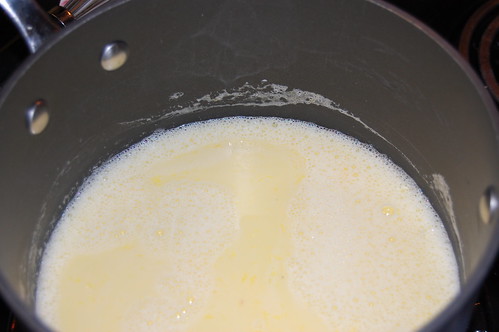
Spread the chopped strawberries in the bottom of an 8x8 glass baking dish. Cover the strawberries with the softened ice cream (about an inch thick) and use an off-set spatula to even out the ice cream over the strawberries. Freeze the ice cream for at least 3 hours so that the ice cream re-sets and becomes firm again. 

Pull the ice cream out of the freezer and run warm water across the bottom of the baking pan to release the ice cream in one large sheet. Using the graham cracker halves as guides, cut the ice cream into blocks and sandwich between two graham cracker halves. Re-freeze the sandwiches, and keep them in the freezer until ready to serve. 

Enjoy!

Read more...

Tomato Soup for the Soul

>> October 10, 2012

Seriously? Why does chicken soup get all the glory? There are few things that a piping hot bowl of tomato soup and a grilled cheese can't fix. 


Now that Fall has officially arrived in Georgia, it's finally appropriate to start pulling out the cozy sweaters, warmer recipes, and (dare I say) boots?!?! I'm super pumped that it's Fall, not only because it's my favorite season but because I love the sense of renewal that comes along with each season. Inevitably, by the time each season comes to a close we are so ready to move on that any change in temperature is cause for a mini celebration. 


These days, I've been eager for a little change in my life. With Josh graduating school, we've closed a chapter in our lives and the next chapter is waiting in the wings. Of course there's excitement that comes with new opportunities, as well as uncertainty about what's around the corner. Not to worry...before my excitement gets out of control my anxiety swoops in to make sure I don't get carried away. You know that saying "the only thing that's certain is death and taxes", well it should be "the only thing that's certain is death, taxes, and Carolyn's anxiety".


At any rate, here's to a new season and new beginnings!

Tomato Soup
Adapted from: Smitten Kitchen
1 28oz Can Whole Tomatoes
1 Tbs Brown Sugar
2 Tbs Butter
1 Large Shallot, Minced
1 Tbs Tomato Paste
1 Tbs Flour
1 Cup Chicken Broth
1/3 Cup Milk (or Cream if you'd like to add richness)


Pre-heat the oven to 450°F and line a baking sheet with aluminum foil. Set a strainer over a bowl, and cut the tomato's in half and remove the seeds. Make sure you retain as much of the juice as possible! We're just trying to get rid of those pesky seeds! Spread the tomato half's on the baking sheet and sprinkle with the brown sugar. Roast them in the oven for about 30 minutes until most of the liquid has evaporated. Pull them out of the oven and set them aside to cool.


Melt the butter of medium heat until foamy and add the tomato paste and minced shallots. Reduce the heat to low and cook the shallots for 7 - 10 minutes. Add the flour and cook until completely incorporated. Gradually start to add the chicken broth and whisk constantly until all of the broth is combined. Add the tomato juice and the roasted tomatoes and bring to a boil. Once the soup reaches a boil, reduce to a simmer and cook for about 10 minutes. 

Pour the soup into a blender (or use an immersion blender) and blend to make the soup creamy! Add the soup back to the pot and add in the milk (or cream) and cook for another 5 minutes. 


Read more...

Grilled Clams

>> September 30, 2012

I'm a bit short on words this time around. Probably one of the few times a year that I'm not incredibly long winded. 

Untitled

At any rate, these grilled clams are absolutely delicious. I saw this recipe a few months ago in one of my food magazines and knew that I at least needed to try it. 

In absence of a fun little story wrapped around a great recipe, I figured I'd give you some tips on how to enjoy these little gems.


Untitled

  • Eat these for dinner after a lazy Sunday afternoon
  • Grill up some really (and I mean really) good bread with garlic and butter to go along with the clammies
  • Make sure you have a really nice, crisp white wine to sip along side the clam's.
  • Eat these outside on your deck, or back patio and soak in the last bits of the day
  • Make sure to use your grill for this entire meal...grilled clams, grilled bread, grilled vegetables. Perfect for the last hurrah of Summer.
Untitled

Grilled Clams

Adapted from: Bon Appétit 

1 Stick Unsalted Butter, at room temperature
1 Tbs Flat Leaf Parsley, Chopped
1 Tbs Chives, Chopped
1 Tbs Scallion, Chopped
1 Tbs Lemon Juice
Kosher Salt & Fresh Cracked Black Pepper
24 Little Neck Clams
Lemon Wedges

Combine the butter, herbs, and lemon juice together until well blended. Season with salt and pepper and set aside.

Scrub the clam shells to remove any excess grit that might be clinging to them. Set your grill, either gas or charcoal to a medium-high heat. Place clams directly on the rack and close the grill cover to cook. Cook for 6-8 minutes, the clams should have all popped open at this point (discard any that haven't opened). 

Transfer the clams to a platter, being careful to keep as much juice in the shells as possible. Dot the clams with the herb butter, and let stand until the butter melts. Serve with lemon wedges to add a bright splash of flavor!

Read more...

Breakfast: Easy Peasy Style

>> June 2, 2012

Dutch Baby Pancake


So the deal in my household is that we LOVE breakfast. The problem with this is that we're not the type that is inclined to jump out of bed a cook a big breakfast complete with pancake, eggs, bacon, fruit, etc. We're the type that is more likely to start the coffee and then starve to 11:30 until we're forced to eat lunch. 


I know it makes no sense, but this is the way that it is. We're morning-ish people...we're awake, and that's about the extent of it.


Dutch Baby Pancake


You can imagine my elation when Josh discovered a recipe that allows you prep the night before with minimal steps. Not to mention the fact that said recipe is a pancake! I mean really, I've never met a pancake that I didn't like.  


This is seriously the easiest recipe on the face of the planet AND it's delicious. I have to admit one of my favorite things about dutch baby's is the poofiness. It's so wonderful and makes you just want to dive into the airy, poofy, wonderfulness.


Dutch Baby Pancake


Aside from all of it's inherent amazing-ness is the fact that it's super adaptable. There are so many ways that you can transform this pancake, that I can't even begin to tell you. You could go all traditional and top with butter & sugar. You could go the fruit route and top it with wonderful berries, lemon juice, or tropical compote. This morning we opted for simply dusted powdered sugar. Either way, it's amazing.


Dutch Baby Pancake
Adapted from: Leite's Culinaria

2/3 Cup Milk
1/4 teaspoon Vanilla Bean Paste (or vanilla extract)
4 Large Eggs
2/3 Cup All Purpose Flour
2 teaspoons Sugar
1/4 teaspoon Kosher Salt
1 1/2 Tablespoon Butter, melted


Combine milk, vanilla bean paste, and eggs in a blender and blend for 15 seconds.


In a separate bowl, combine flour, sugar and salt and mix to combine. Add the flour mixture to the blender and blend until just combined.


Add the melted butter to the blender and blend for 30 seconds. Pour the batter back into the mixing bowl, cover tightly and refrigerate over night.


**In the Morning**
Pre-heat the oven to 400 degrees, and make sure the rack is in the middle of the oven. 


Butter a cast iron skillet (or oven proof skillet) and place in the oven for 5 minutes to get it really hot.


After the skillet has been heated, pull it out of the oven and pour the batter into the pan. Bake for 15 minutes, then turn the skillet 180 degrees and bake for another 10 minutes until the pancake has risen high on the sides and is golden in the middle. 


Pull the dutch baby out of the oven and slide it right out of the pan and onto a plate. Serve/top with whatever accoutrements you so desire.


Happy Breakfast!

Read more...

One Bowl Chocolate Cupcakes with Nutella Cloud Frosting

>> May 21, 2012


Gah, I love that it takes me roughly three months to write a new blog post. I know, I'm just #thatawesome. Actually it's legit been crazy busy around here. Since my last post this has happened: 
  • Josh moved back from his internship stint in Virginia
  • Josh graduated from Chiropractic School
  • I visited San Francisco
  • Holiday Inn hit 100,000 fans on Facebook
  • Josh completed his last board exam! #woot
  • My cousin's 1st Holy Communion
We've had family & friends in and out of town to celebrate the various goings on so we've been taking time to really hang back and enjoy life. Too often we, get caught up in trying to stick to a strict schedule, or participate in EVERYTHING going on around us. But lately it's been nice to sit back and relax for a little while. 

So these cupcakes were a celebration of all the things that we've accomplished as of late.


Oddly, this was the smallest batch of cupcakes that I've ever baked. The recipe made a grand total of nine. That's right...nine cupcakes. I should have known when I was reading through the recipe that the dimensions were all really small, but of course I didn't. The great thing is that the recipe can be easily multiplied without having to do "higher" math. Or you could just keep the recipe small and simple, as is.


I made these cupcakes to celebrate the Holiday Inn Facebook wall milestone of 100k fans. Which may seem odd, but seeing as I know the gal that manages the page, I think it's quite appropriate!


The great thing about these cupcakes is that they're beyond easy to make, and you can keep your dirty dishes down to a max of two mixing bowls. #score

The cake is super chocolate-y and moist thanks to the addition of brewed espresso in the batter and the frosting is exactly as it sounds. Nutella cloud goodness. You must try some. today.


One Bowl Chocolate Cupcakes
Adapted from: Sweetapolita

3/4 Cup All-Purpose Flour
3/4 Cup White Sugar
1/4 Cup Dark Cocoa Powder
3/4 teaspoon Baking Soda
3/4 teaspoon Baking Powder
3/4 teaspoon Cornstarch
1/2 teaspoon salt
1/3 Cup Buttermilk
1/4 Cup Brewed Espresso (hot)
3 Tablespoons Vegetable Oil
1 Egg, room temp
2 teaspoons Pure Vanilla Extract

Preheat the oven to 350 and line cupcake pan with cupcake liners.

Sift all dry ingredients into a large mixing bowl (if using a KitchenAid, use the paddle attachment) and stir together.
Add all remaining ingredients into the bowl of dry ingredients and mix for 2 minutes on medium speed.

Pour batter into cupcake molds and bake for 15-17 minutes (I found 15 minutes to be the perfect time). Let the cupcakes cool in the pan for 10 minutes and then let them completely cool on a wire rack for 20-30 minutes.

Nutella Cloud Frosting

1 Cup Unsalted Butter, softened
1 1/2 Cups Powdered Sugar
2 teaspoons Pure Vanilla Extract
3/4 Cup Premium Bittersweet Chocolate, melted but cool (I used Scharffen Berger)
1/3 Cup Nutella
1 Tablespoon Milk
Pinch of Salt

Beat the powdered sugar and butter on low speed for 1 minute (if using a KitchenAid, use the paddle attachment).

Add vanilla, and beat on low until combined. Then slowly pour in the melted and cooled chocolate and beat on medium speed until smooth (about two minutes).

Add the Nutella, milk and salt and beat on medium-high for another minute.

Taste the frosting...you know, just to make sure it's cupcake worth :)


Read more...

Meatballs. Oh, and that pasta stuff.

>> October 14, 2011

Meatballs


I recognize that the title of this post is disturbing. In fact, I deleted three times. But let me hit you with some truth.


The truth is...meatballs are amazing. So amazing that pasta can (sometimes) pale in comparison. I mean really, I feel so blasphemous for even saying that but that's what real friends do...they're honest with each other. Right?


The thing is, I didn't grow up eating a lot of meatballs. It just wasn't really my thing. In fact I still don't eat meat with the "holy mother" 8+ hour sauce because, well who does? But meatballs really elevate my everyday sauce that I make during the work week. 


Meatballs


It turns out that beef, pork, and veal are pretty awesome when they're held precariously together by a little egg, breadcrumb, and cheese. Then you can amp things up to a little bit of awesome when you pan fry them, and finish cooking them in a tomato and wine sauce. Yes.


Meatballs


I have no other words other than, make. this. immediately.


Meatballs & Linguine*
Adapted from: Smitten Kitchen


meatballs
1/2 lb Beef
1/2 lb Veal
1/2 lb Pork
1 Cup Fresh Bread Crumbs
1.5 Tbs Flat Leaf Parsley
1/2 Cup Freshly Grated Parmesan**
1 tsp Onion Powder
1 Egg, beaten
Salt
Pepper
Vegetable Oil


sauce
1 Tbs Olive Oil
1/2 Cup Yellow Onion, chopped
3 Garlic Cloves, minced
1/2 tps Red Pepper Flakes
1/2 Cup Red Wine
28 oz can Crushed Tomatoes
Salt
Pepper


pasta
1 lb Linguine
Freshly Grated Parmesan


Make the Meatballs: 
Combine all the meatball ingredients plus 1/4 cup  of warm water and mix with your hands until just combined. Make sure not to over mix. With your hand or the (the cookie scoop you've been eyeing) form the mixture into 1.5 inch meatballs.


Pour vegetable oil into a 12-inch skillet to a depth of 1/4 inch. Heat the oil on medium heat and carefully brown the meatballs (in batches) on all sides. Once the meatballs are browned on all sides, remove them and set aside on a plate. Once all the meatballs have been browned, discard the oil except for 1 Tbs but do not clean the pan.


Make the Sauce: 
Heat the oil on medium heat, and cook the onion until soft and translucent. Add garlic and red pepper flakes and saute for 1 minute. Add the wine and scrape up any yummy bits that have clung to the bottom of the pan until half of the liquid evaporates (2 minutes). Stir in the tomatoes, and salt and pepper to taste.


Add the meatballs to the sauce and simmer over very low heat for 30 - 60 minutes. Stir occasionally and watch the sauce so that it doesn't burn.


Cook the linguine to al dente. Drain the pasta, and toss with a bit of sauce to coat the pasta. Serve with a helping serving of more sauce, meatballs, and freshly grated Parmesan.


*I can't stand spaghetti, so I sub Linguine for everything
**Please, for the love of our dear Lord don't use pre-grated parm. It's really unnecessary.

Read more...

Summer Lovin'

>> June 23, 2010

Lately I’ve been in a fierce berry craving mode, I don’t know if it’s the sun and the warmer weather or the fact that the markets are bursting with these beauties everywhere. Either way, I got berry on the brain.

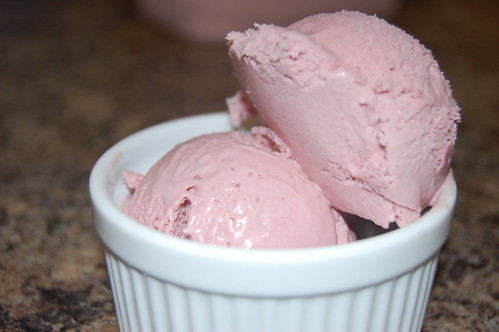
I found some gorgeous blackberries last week and decided to whip them into an ice cream with my new best friend!
Please welcome Darla!

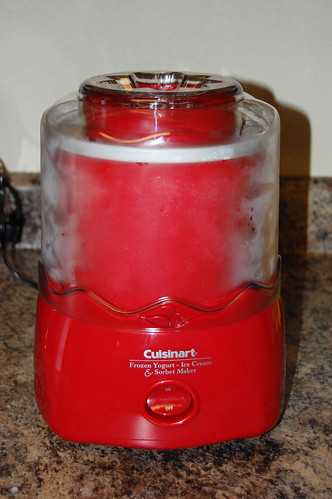
Darla entered my life only a few weeks ago and we’re quickly becoming great friends. Especially since she helps me whip out awesome ice creams like Blackberry, and Cheesecake w. Blueberry Lime Swirl – I mean hello!

The blackberry ice cream is really simple to make, but I must warn it’s not a one-bowl recipe by a long shot. I may have used every bowl I own, but it was definitely work the dishes!


Excuse me while I induce a brain freeze


Blackberry Ice Cream
(adapted from the
Master)
2 Pints of Blackberries (preferably fresh)
Juice from ½ Lemon
1 ¼ cup of Sugar (divided into 1 cup and ¼ cup)
1 ½ cup Half-and-Half
5 large Egg Yolks
1 ½ cup Heavy Cream

Combine blackberries, ¼ cup of sugar and lemon juice in a medium saucepan. Cook over low heat, covered and stir occasionally for 20 – 25 minutes until the berries have cooked down and formed a lovely juice! Strain the cooked berries into a bowl and press the berries through the sieve to get as much juice out of them as possible. Set aside to cool.

Combine half-and-half and remaining sugar in a small saucepan over low heat and bring to almost a boil.

While the half-and-half is heating, beat the egg yolks until they are pale yellow and slightly thickened. Temper the eggs with the half-and-half mixture by slowly adding 1 cup of the half-and-half whisking constantly.

Once the eggs have been tempered, add them into the remaining half-and-half in the saucepan and cook over low heat until thickened. Strain the custard into a bowl and stir in the heavy cream.

Add the blackberry juice to the custard mixture and stir to combine. Chill the mixture completely in the refrigerator over night and then freeze in an ice cream maker until thick.

Once the ice cream maker is finished making its’ magic, you can enjoy soft serve ice cream or freeze the ice cream in the freezer for a few hours until firm.

buon appetito! ciao!


Read more...

  © Blogger template Simple n' Sweet by Ourblogtemplates.com 2009

Back to TOP