Follow my blog with Bloglovin
Showing posts with label breakfast. Show all posts

Breakfast: Easy Peasy Style

>> June 2, 2012

Dutch Baby Pancake


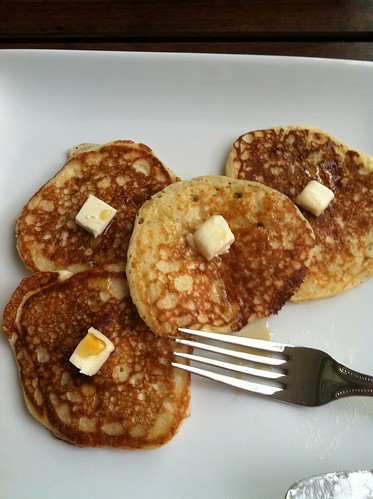
So the deal in my household is that we LOVE breakfast. The problem with this is that we're not the type that is inclined to jump out of bed a cook a big breakfast complete with pancake, eggs, bacon, fruit, etc. We're the type that is more likely to start the coffee and then starve to 11:30 until we're forced to eat lunch. 


I know it makes no sense, but this is the way that it is. We're morning-ish people...we're awake, and that's about the extent of it.


Dutch Baby Pancake


You can imagine my elation when Josh discovered a recipe that allows you prep the night before with minimal steps. Not to mention the fact that said recipe is a pancake! I mean really, I've never met a pancake that I didn't like.  


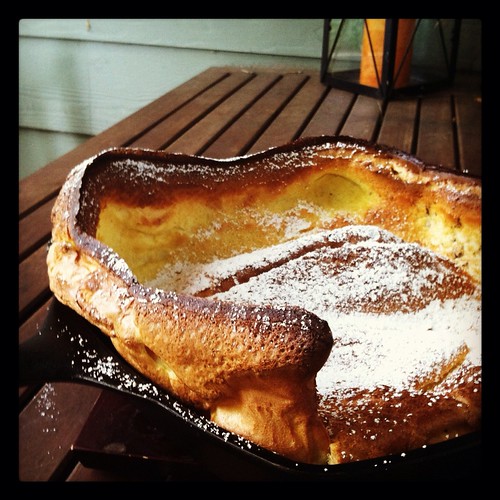
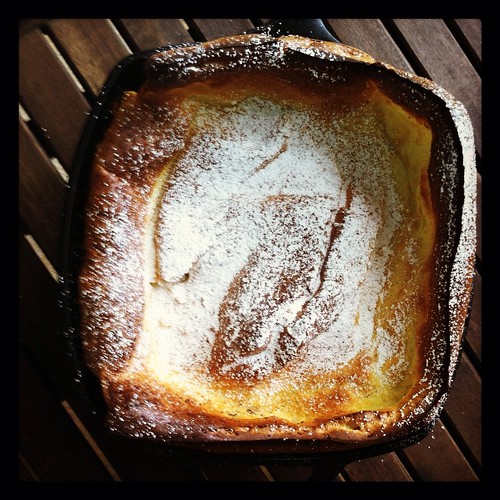
This is seriously the easiest recipe on the face of the planet AND it's delicious. I have to admit one of my favorite things about dutch baby's is the poofiness. It's so wonderful and makes you just want to dive into the airy, poofy, wonderfulness.


Dutch Baby Pancake


Aside from all of it's inherent amazing-ness is the fact that it's super adaptable. There are so many ways that you can transform this pancake, that I can't even begin to tell you. You could go all traditional and top with butter & sugar. You could go the fruit route and top it with wonderful berries, lemon juice, or tropical compote. This morning we opted for simply dusted powdered sugar. Either way, it's amazing.


Dutch Baby Pancake
Adapted from: Leite's Culinaria

2/3 Cup Milk
1/4 teaspoon Vanilla Bean Paste (or vanilla extract)
4 Large Eggs
2/3 Cup All Purpose Flour
2 teaspoons Sugar
1/4 teaspoon Kosher Salt
1 1/2 Tablespoon Butter, melted


Combine milk, vanilla bean paste, and eggs in a blender and blend for 15 seconds.


In a separate bowl, combine flour, sugar and salt and mix to combine. Add the flour mixture to the blender and blend until just combined.


Add the melted butter to the blender and blend for 30 seconds. Pour the batter back into the mixing bowl, cover tightly and refrigerate over night.


**In the Morning**
Pre-heat the oven to 400 degrees, and make sure the rack is in the middle of the oven. 


Butter a cast iron skillet (or oven proof skillet) and place in the oven for 5 minutes to get it really hot.


After the skillet has been heated, pull it out of the oven and pour the batter into the pan. Bake for 15 minutes, then turn the skillet 180 degrees and bake for another 10 minutes until the pancake has risen high on the sides and is golden in the middle. 


Pull the dutch baby out of the oven and slide it right out of the pan and onto a plate. Serve/top with whatever accoutrements you so desire.


Happy Breakfast!

Read more...

Chunky Apple Muffins

>> October 9, 2011

Fall is my absolute favorite time of the year. The cooler temperatures and the beautiful colors of the leaves always seem to put an extra pep in my step! Another one of my favorite things about Fall are the flavors... cinnamon, nutmeg, pumpkin, and apples. Warm flavors that make you feel all comfy and cozy on the inside. I love being comfy and cozy on the inside. 


Last week was high time that officially kick off my fall recipes, so I started with breakfast!  Every Sunday afternoon I make my breakfast for the rest of the week because I sleep too late to do it before work every morning. What better way to start of your day, than with super awesome apple muffins that are chock full of apple chunks and cinnamon? I mean right?


Chunky Apple Muffins


Speaking of super awesome things like muffins full of apple chunks, my husband and I took a trip to Colorado during the second most amazing time of the year (second to ski season) and really got in the fall spirit. The Aspen's had begun to change colors and it was my first time being in Colorado during the Fall. It was absolutely. Freaking. Gorgeous.


Aspens(2)


This was taken in Rocky Mountain National Park as we were waiting for the shuttle bus to take us to the trailhead for our hike. The orange and red colors were so beautiful up close, but it was really amazing to see the patches of orange amongst the evergreens on the mountains.


It was truly an amazing trip - we saw some of the most beautiful views on our hike through Rockies.


NymphLake

I just love this place

RMNP


   Alrighty. back to the muffins. These were super yummy and I health-a-fied them a little by swapping half of the AP (all-purpose) flour for whole wheat. The greatest surprise was the apple slice on top, while baking the apple sort of dehydrates and adds this lovely chewiness to the muffins' overall texture.
Chunky Apple Muffins


Oh, and did I mention that it was chock full of apple? Delish.


Chunky Apple Muffins

Adapted From: Martha Stewart

Cooking Spray
1 Granny Smith Apple, peeled, cored, and quartered
1 Cup Sugar
1 Cup All-Purpose Flour
1 Cup Whole Wheat Flour
2 teaspoons Baking Soda
1/2 teaspoon plus 2 pinches Salt
1 teaspoon Cinnamon
1/4 Cup Chopped Walnuts, toasted
2 Large Eggs
1 Cup Buttermilk, room temperature
1/2 Cup Unsalted Butter, melted

Preheat oven to 400 degrees. Spray a 12-cup standard muffin tin with cooking spray and set aside. Cut 2 apple quarters into a 1/4-inch dice and cut the remaining quarter into 12 thin slices.

Whisk together sugar, flour, baking soda, salt, and cinnamon in a medium bowl. Add diced apple and walnuts and toss to coat. Whisk together eggs, buttermilk, and butter in a separate bowl. Fold the buttermilk mixture into the flour mixture until just combined. Don't over mix, but make sure the dry ingredients are completely incorporated. The batter will be very thick. Spoon the batter among the muffin cups, and fill each cup about three-quarters of the way full. Top each cup with an apple slice.

Bake until the muffins are brown around the edges and spring back when touched 16 - 18 minutes (mine took 16). Let muffins cool slightly for about 5 minutes, and then completely cool on a wire rack.

The muffins last about a week when kept in an airtight container.

Read more...

Buttermilk Makes My Heart Zing

>> April 10, 2011

Buttermilk Pancakes

Buttermilk and I didn’t get off to a great start. My grandmother loved buttermilk, so much so that she would keep a container in the fridge for drinking...as if it were regular milk. Buttermilk was regularly served for dinner when she was a little girl so she was used to it.

My first encounter wasn’t as wonderful. I remember it so vividly - my brother and I were visiting my grandmother for the day and I decided to grab an ice cold glass of milk! Sounds awesome right? Wrong. Oh so wrong. Being the independent person that I am, I poured my own lovely glass of...buttermilk. Talk about a rude awakening. So needless to say, it was quite some time before I tried buttermilk again.

It’s only in the past several years that I’ve come to understand its amazingness. I started making cakes and cookies where buttermilk was included in the recipe. And then I tried real buttermilk pancakes. Holy heck. I absolutely can’t get enough of the tang and the zing that buttermilk adds to everything! This past Saturday was the laziest of Saturday’s and was the perfect excuse to make buttermilk pancakes. And so I did - and they were fantastic!

Best Buttermilk Pancakes
adapted from Martha Stewart

1 Cup All-Purpose Flour
1 tsp Baking Powder
1/2 tsp Baking Soda
1/4 tsp Salt
1 1/2 Tbs Sugar
1 Large Egg, lightly beaten
1 1/2 Cup Buttermilk
2 Tbs Unsalted Butter, melted

Heat pan on medium high*, and heat the oven to 250 to keep the pancakes warm.

Whisk the flour, baking powder, baking soda, salt, and sugar in a medium bowl. Add egg, buttermilk using the whisk. Be careful not to over mix the batter, it should be lumpy.

Once the pan is hot, baste the bottom of the pan with some of the melted butter with a pastry brush. Using a 1/2 cup scoop, our the pancake batter into the pan - my pan was large enough to do three small pancakes at a time. Flip the pancakes when the pancakes bubble, and are slightly dry around the edges. Cook until golden brown.

As you’re working in batches, keep the finished pancakes on a oven-proof plate in the oven to stay warm while you’re finishing the rest of the pancakes.

*I use the pancake method a la Smitten Kitchen.

Read more...

  © Blogger template Simple n' Sweet by Ourblogtemplates.com 2009

Back to TOP