Follow my blog with Bloglovin

Apple Braised Turkey Thighs

>> October 25, 2011

Cider Braised Turkey Thighs


We've been on apple overload lately. I keep finding ways to throw them into sweet and savory dishes because they're delicious and I have an entire bushel of them. A few weekends ago we did our annual trip to North Georgia to pick pumpkins and apples. We've been making this trip for the past several years and it's I look forward to it all year!


Cider Braised Turkey Thighs


The weather this time of the year is gorgeous, which doesn't even compare to the colors of the fall leaves in the mountains. Not to mention we have the coolest pumpkin farm on the face of the planet. The apple farm is pretty fun too, the apple season is almost over at this point so instead of picking apples off the trees we generally buy them from their store. We also buy their apple butter and the best dang candy apple I've ever tasted. For realz.


Cider Braised Turkey Thighs


Anyway - on to more important matters. This was one of those recipes that I found knew that I had to make this immediately. It's a good thing I did, this recipe is the epitome of Fall. It's super delish, crazy easy to make, and makes you want to curl up on the couch with a blanket and a book. There's nothing better!


Apple Braised Turkey Thighs
Adapted from: Martha Stewart


1 Tbs Olive Oil
2 Turkey Thighs or 2 lbs (Boneless, Skin-on)
2 Large Shallots, thinly sliced
4 Apples peeled, quartered, & cored (I used a mixture of granny smith and gala)
2 Cups Apple Cider
14.5 oz Chicken Broth
3 tsp Cider Vinegar 


Preheat the oven to 350 degrees. Heat the olive oil over medium-high heat in a dutch oven or heavy bottomed pot. Season the turkey thighs with S&P and place skin side down and cook until skin is crisp and golden and then transfer to a plate to rest (yes, just cook one side). Add shallots and cook until soft. Add apples and cook until slightly soft (about 5 minutes).


Return the turkey to the pot (skin side up) and add the cider, chicken broth and bring to a boil. Once the liquid starts to boil, cover the pot and place in the oven and cook for 1 1/2 hour. Uncover and cook for another 30 minutes.


Take the pot out of the oven and move the turkey to a plate to rest. Skim the fat from the cooking liquid or use a fat separator, and stir in the vinegar to the remaining gravy. Serve turkey with apples and gravy! Enjoy!

Read more...

Meatballs. Oh, and that pasta stuff.

>> October 14, 2011

Meatballs


I recognize that the title of this post is disturbing. In fact, I deleted three times. But let me hit you with some truth.


The truth is...meatballs are amazing. So amazing that pasta can (sometimes) pale in comparison. I mean really, I feel so blasphemous for even saying that but that's what real friends do...they're honest with each other. Right?


The thing is, I didn't grow up eating a lot of meatballs. It just wasn't really my thing. In fact I still don't eat meat with the "holy mother" 8+ hour sauce because, well who does? But meatballs really elevate my everyday sauce that I make during the work week. 


Meatballs


It turns out that beef, pork, and veal are pretty awesome when they're held precariously together by a little egg, breadcrumb, and cheese. Then you can amp things up to a little bit of awesome when you pan fry them, and finish cooking them in a tomato and wine sauce. Yes.


Meatballs


I have no other words other than, make. this. immediately.


Meatballs & Linguine*
Adapted from: Smitten Kitchen


meatballs
1/2 lb Beef
1/2 lb Veal
1/2 lb Pork
1 Cup Fresh Bread Crumbs
1.5 Tbs Flat Leaf Parsley
1/2 Cup Freshly Grated Parmesan**
1 tsp Onion Powder
1 Egg, beaten
Salt
Pepper
Vegetable Oil


sauce
1 Tbs Olive Oil
1/2 Cup Yellow Onion, chopped
3 Garlic Cloves, minced
1/2 tps Red Pepper Flakes
1/2 Cup Red Wine
28 oz can Crushed Tomatoes
Salt
Pepper


pasta
1 lb Linguine
Freshly Grated Parmesan


Make the Meatballs: 
Combine all the meatball ingredients plus 1/4 cup  of warm water and mix with your hands until just combined. Make sure not to over mix. With your hand or the (the cookie scoop you've been eyeing) form the mixture into 1.5 inch meatballs.


Pour vegetable oil into a 12-inch skillet to a depth of 1/4 inch. Heat the oil on medium heat and carefully brown the meatballs (in batches) on all sides. Once the meatballs are browned on all sides, remove them and set aside on a plate. Once all the meatballs have been browned, discard the oil except for 1 Tbs but do not clean the pan.


Make the Sauce: 
Heat the oil on medium heat, and cook the onion until soft and translucent. Add garlic and red pepper flakes and saute for 1 minute. Add the wine and scrape up any yummy bits that have clung to the bottom of the pan until half of the liquid evaporates (2 minutes). Stir in the tomatoes, and salt and pepper to taste.


Add the meatballs to the sauce and simmer over very low heat for 30 - 60 minutes. Stir occasionally and watch the sauce so that it doesn't burn.


Cook the linguine to al dente. Drain the pasta, and toss with a bit of sauce to coat the pasta. Serve with a helping serving of more sauce, meatballs, and freshly grated Parmesan.


*I can't stand spaghetti, so I sub Linguine for everything
**Please, for the love of our dear Lord don't use pre-grated parm. It's really unnecessary.

Read more...

Chunky Apple Muffins

>> October 9, 2011

Fall is my absolute favorite time of the year. The cooler temperatures and the beautiful colors of the leaves always seem to put an extra pep in my step! Another one of my favorite things about Fall are the flavors... cinnamon, nutmeg, pumpkin, and apples. Warm flavors that make you feel all comfy and cozy on the inside. I love being comfy and cozy on the inside. 


Last week was high time that officially kick off my fall recipes, so I started with breakfast!  Every Sunday afternoon I make my breakfast for the rest of the week because I sleep too late to do it before work every morning. What better way to start of your day, than with super awesome apple muffins that are chock full of apple chunks and cinnamon? I mean right?


Chunky Apple Muffins


Speaking of super awesome things like muffins full of apple chunks, my husband and I took a trip to Colorado during the second most amazing time of the year (second to ski season) and really got in the fall spirit. The Aspen's had begun to change colors and it was my first time being in Colorado during the Fall. It was absolutely. Freaking. Gorgeous.


Aspens(2)


This was taken in Rocky Mountain National Park as we were waiting for the shuttle bus to take us to the trailhead for our hike. The orange and red colors were so beautiful up close, but it was really amazing to see the patches of orange amongst the evergreens on the mountains.


It was truly an amazing trip - we saw some of the most beautiful views on our hike through Rockies.


NymphLake

I just love this place

RMNP


   Alrighty. back to the muffins. These were super yummy and I health-a-fied them a little by swapping half of the AP (all-purpose) flour for whole wheat. The greatest surprise was the apple slice on top, while baking the apple sort of dehydrates and adds this lovely chewiness to the muffins' overall texture.
Chunky Apple Muffins


Oh, and did I mention that it was chock full of apple? Delish.


Chunky Apple Muffins

Adapted From: Martha Stewart

Cooking Spray
1 Granny Smith Apple, peeled, cored, and quartered
1 Cup Sugar
1 Cup All-Purpose Flour
1 Cup Whole Wheat Flour
2 teaspoons Baking Soda
1/2 teaspoon plus 2 pinches Salt
1 teaspoon Cinnamon
1/4 Cup Chopped Walnuts, toasted
2 Large Eggs
1 Cup Buttermilk, room temperature
1/2 Cup Unsalted Butter, melted

Preheat oven to 400 degrees. Spray a 12-cup standard muffin tin with cooking spray and set aside. Cut 2 apple quarters into a 1/4-inch dice and cut the remaining quarter into 12 thin slices.

Whisk together sugar, flour, baking soda, salt, and cinnamon in a medium bowl. Add diced apple and walnuts and toss to coat. Whisk together eggs, buttermilk, and butter in a separate bowl. Fold the buttermilk mixture into the flour mixture until just combined. Don't over mix, but make sure the dry ingredients are completely incorporated. The batter will be very thick. Spoon the batter among the muffin cups, and fill each cup about three-quarters of the way full. Top each cup with an apple slice.

Bake until the muffins are brown around the edges and spring back when touched 16 - 18 minutes (mine took 16). Let muffins cool slightly for about 5 minutes, and then completely cool on a wire rack.

The muffins last about a week when kept in an airtight container.

Read more...

The healthier side of carbs

>> September 21, 2011

Whole Wheat Penne w. Sausage & Kale


I've been told that the day I was born, I was already 30. Which I've always found to be really amusing, because on the inside I've always felt like I wasn't a day over 9. But in truth, for the most part I've always behaved as if I were an adult. For instance, as I am writing this post it is 9:51pm and I have been in bed for at least 30 minutes. What can I say, I love my pajamas and I love my bed. So there you have it.

Whole Wheat Penne w. Sausage & Kale

I'm also a planner (read: control freak). This sometimes becomes more apparent when life becomes hectic or I'm only a participant of a project and not the leader of the project. I am such a planner that I started looking for my first job out of college 8 months before graduation. I eventually did find a job at a fantastic company and my first day was only a mere 4 days after I graduated because I was so intent on supporting myself financially. I've been told that this is extremely mature. Whatevs.

Whole Wheat Penne w. Sausage & Kale

Anywhoo, that is a long way of saying that I've been trying to be more of an "adult" and inject more vegetables into my diet and less, well...Chick-fil-a. Enter: Whole Wheat Penne with Sausage, Chard Kale, and Artichoke Hearts. The recipe didn't go according to plan because I didn't purchase some items, forgot to use some items, and in some instances used entirely different items, but amazingly was still amazingly tasty. I'm sure the mound of parm had nothing to do with this. 

Whole Wheat Penne w. Sausage & Kale

Eating whole wheat pasta is healthy right? I've completely mangled the orignal recipe, but surprisingly it was still really, really tasty! Seriously...even Josh liked it! Which is impressive, especially considering the fact that I left out one of his favorite ingredients (sun-dried tomatoes) and doubled the amount of greens that the recipe called for. Although, I will say, that the next time I make this I'll do so with pork sausage instead of chicken to impart more sausage-y flavor into the dish * oink *.  Just do me a favor and make sure you grate plenty of fresh parmesan cheese over the top and you'll be golden.

Whole Wheat Penne w. Sausage & Kale


Whole Wheat Penne w. Sausage and Kale
Adapted (very liberally) from: Martha Stewart

12 ounces Whole Wheat Penne
2 Tbs Olive Oil
3/4 Lb Sausage (mild)
3/4 Lb Kale, washed thoroughly and chopped*
1 small Onion, chopped
3 Tbs Red Wine Vinegar*
1/2 Cup Water
3 cloves Garlic, minced
1/3 Cup Sun-dried Tomatoes, sliced*
1 Tbs Tomato Paste
3/4 Cup Parmesan Cheese, freshly grated
1/3 Cup Basil, chopped
1/4 tsp Crushed Red Pepper

Start a large pot of salted water to boil for the pasta.  While the water is heating, add 1 Tbs of olive il to a large skillet over medium-high heat. Add the sausage and cook while using the back of a wooden spoon to break the sausage into pieces, cook through until browned. Once the sausage is cooked, set aside on a plate.

Start the remaining Tbs of olive oil in the skillet and cook the onion and garlic until softened (3-4 minutes). Add the kale, red wine vinegar, and water to the onion mixture. Scrape up all of the yummy bits and combine the ingredients together. Cover the kale mixture and cook, stirring occasionally for 7-8 minutes until the kale is wilted and cooked through. Add the sausage back to the kale mixture, remove from heat, and set aside.

Add the pasta to the boiling water until 2 minutes short of al dente. Add sun-dried tomatoes and cook 2 minutes. Reserve 1 cup of pasta water, drain pasta, and return to pot.

Pour half of the reserved pasta water into a small bowl and add the tomato paste, whisk to combine. Add the tomato paste mixture, sausage/kale mixture, basil, parmesan, and red pepper flakes to the pasta pot and combine. Add additional pasta water if needed, and season with salt and pepper.

*I was too lazy to find Swiss Chard at the store, so I grabbed Kale instead. My favorite way to cook kale is to steam it with a little red wine vinegar for some bite, which adds a lovely layer of flavor to the overall dish. I also left out sun-dried tomatoes from the finished dish, not intentionally but because I completely forgot. I would have loved to have seen bits of red amongst all the green and brown pasta, and I'm sure it would have tasted quite yummy...although surprisingly didn't lack in flavor without them.

Read more...

Everyday Craziness & Appetizers for Dinner

>> September 18, 2011

I'm going to get right to it. You know, cut to the chase.


It's been about a zillion years since I've posted, and let's be honest...I've not been the best at staying regular (ha! I'm so funny). I mean I've never been great about sticking to a schedule. Sometimes I go two or three days without washing my hair. So it's only normal that I go several months between blog posts.


But for this, I am sorry. I promise I'm going to work on posting more frequently, but this means that some things are going to change around here. While MiniGuinea will largely remain a blog centered around my escapades with recipes I find all over the interwebs, I'm also going to start posting about my everyday craziness. This past year has been amazing and amazingly crazy...I can only imagine where our lives will go from here. So for now I'll leave you with our dinner of appetizer's and the notion that there's no telling what kind of non-sense will ensue from here.


Goat Cheese & Pancetta Salad on Sweet Potato Medallions


Anyway for an unknown reason, I find the idea of eating appetizer's for dinner really appealing. Don't you? It sounds like so much fun.


So, after a much needed weekend of nothing (is tomorrow really Monday?) Having appetizer's for dinner only seemed like the right thing to do.


These were completely delicious and and I know this, well...because I ate them and I liked them. But also because Josh ate them and loved them too. As he should because I added pancetta solely for his enjoyment...right, solely his enjoyment.


Goat Cheese & Pancetta Salad atop Sweet Potato Medallions
Adapted from: (my idol) Smitten Kitchen

Serves 2


1 Sweet Potato (very large) peeled and sliced into 1/2 inch medallions
4 Tbs Olive Oil
1/4 cup of Cashews
1/4 Lb Pancetta, diced
1 Shallot, minced
2 Stalks of Celery
2 Tbs Flat-Leaf Parsley
3 Oz Goat Cheese
1 Tbs Red Wine Vinegar
1/2 tsp Dijon Mustard (the good stuff)


Preheat the oven to a screaming 450 degrees.


Coat a baking sheet generously with olive oil, and lay the sweet potato medallions in one layer on the baking sheet and sprinkle with salt & pepper. Roast the potatoes without interruption for 15 minutes (possibly 20). Flip each piece over (the bottoms of the potatoes should be dark and blistered) and roast a remaining 10 minutes so that the tops match the bottoms.


While the potatoes are roasting, prepare the salad.


Cook the pancetta over medium-high heat until crisp and the fat has rendered. Once the pancetta has cooked, set aside to cool on a paper towel lined plate. In a separate bowl, combine the minced shallot and the red wine vinegar and set aside. Chop the cashews, celery, and parsley and crumble the goat cheese, then toss together to combine.


Stir the dijon mustard into the shallot, vinegar mixture. Once the mustard is combined, Whisk in a few tablespoons of olive oil into the dressing. Add the cooked pancetta, and shallot dressing to the celery mixture and toss to combine. Eat a little bit of this salad that is totally delish to tide you over.


To serve, place the sweet potato medallions onto a platter and spoon the salad mixture over each medallion. Dust the finished medallions with a bit of freshly cracked black pepper, and snarf them down immediately.

Read more...

Chocolate Chip Cookies

>> July 4, 2011

chocolate chip cookies


I’m still on the look-out for my favorite chocolate chip cookie recipe (I’m open for suggestions!), so this was another attempt at finding a recipe that I could call my own. Or at least consider my “go to” for chocolate chip cookies.
So this may be a bit of a downer. I know, you’re thinking “how can this be a downer? We’re talking chocolate chip cookies!”. Maybe “downer” is too strong of a word, while these are yummy chocolate chip cookies they are by no means show stopping. But we certainly had no difficulty finishing them off, if you catch my drift.

chocolate chip cookies


I liked the cinnamon-y-ness (word?) of this version, but the texture wasn’t what I was looking for. They were a little too much on the crispy side, and while I prefer a crispier cookie (burnt sugar anyone?) over soft & chewy, these were a little too crispy for my tastes. I tried baking them for less time, but I wasn’t able to get them off the cookie sheet without them falling apart.
I still contend that you should give ‘em a shot, maybe you’ll have better results that I!
Chocolate Chip Cookies
Adapted From: Girl Who Bakes
1 cup unsalted butter
1 cup brown sugar
1 cup white sugar
1 egg
1 tsp vanilla
1 1/2 cups all-purpose flour
1 tsp baking soda
1 1/2 tsp salt
2 tsp cinnamon
1 1/2 cups chocolate chips
Preheat oven to 350 degrees, and line baking sheet with silpat or parchment paper. Then cream both sugars and butter until light and fluffy. Add egg and vanilla and mix until evenly combined.
Add flour, baking soda, salt, and cinnamon to mixing bowl and combine. Add chocolate chips and stir by hand until evenly distributed.
Drop cookies an inch and half apart on cookie sheets and bake for 8-12 minutes or until golden brown.

Read more...

Classic Wedge Salad

>> May 4, 2011

Classic Wedge Salad


I know what you’re thinking. We’re in the thick of spring and I come home from the farmer’s market with...iceberg lettuce? Odd I know, the markets are teeming with amazing spring green vegetables iceberg lettuce is the least green of them all. I actually never buy the stuff unless I’m making this salad, and after I saw this featured on another blog I had a weird craving for bacon and tomatoes coated in blue cheese dressing.
Classic Wedge Salad


Josh is a huge fan of bacon and blue cheese, so I knew he’d be game. Although to give him credit, I’ve been packing tons of kale, spinach, rapini, and the likes into our diet lately and he actually prefers the higher dosage of greens.
Classic Wedge Salad


Wedge Salad
Adapted From: Give a Girl a Cookie
1 Head of Iceberg Lettuce, quartered
1 Cup Grape Tomatoes, Halved
5 Strips of Thick Cut Bacon, cooked until crisp & crumbled
4 Ounces Bleu Cheese, crumbled (I used Stilton)
1/4 Cup Sour Cream
1/4 Cup Buttermilk
1 Tbs Lemon Juice
1 tsp Red Wine Vinegar
Dressing: 
Combine the bleu cheese crumbles, sour cream, buttermilk, lemon juice, and red wine vinegar in a small bowl and mix to combine. Salt and Pepper as needed. If the dressing is too thick for your liking you can always add more buttermilk to thin it out.
Assemble the Salad: 
Arrange the lettuce on a platter and drizzle the dressing over the wedges, sprinkle the bacon and tomatoes over the lettuce and serve!
**You can always add chopped chives, extra blue cheese crumbles, and more cracked black pepper to up the pretty factor a bit.

Read more...

Buttermilk Makes My Heart Zing

>> April 10, 2011

Buttermilk Pancakes

Buttermilk and I didn’t get off to a great start. My grandmother loved buttermilk, so much so that she would keep a container in the fridge for drinking...as if it were regular milk. Buttermilk was regularly served for dinner when she was a little girl so she was used to it.

My first encounter wasn’t as wonderful. I remember it so vividly - my brother and I were visiting my grandmother for the day and I decided to grab an ice cold glass of milk! Sounds awesome right? Wrong. Oh so wrong. Being the independent person that I am, I poured my own lovely glass of...buttermilk. Talk about a rude awakening. So needless to say, it was quite some time before I tried buttermilk again.

It’s only in the past several years that I’ve come to understand its amazingness. I started making cakes and cookies where buttermilk was included in the recipe. And then I tried real buttermilk pancakes. Holy heck. I absolutely can’t get enough of the tang and the zing that buttermilk adds to everything! This past Saturday was the laziest of Saturday’s and was the perfect excuse to make buttermilk pancakes. And so I did - and they were fantastic!

Best Buttermilk Pancakes
adapted from Martha Stewart

1 Cup All-Purpose Flour
1 tsp Baking Powder
1/2 tsp Baking Soda
1/4 tsp Salt
1 1/2 Tbs Sugar
1 Large Egg, lightly beaten
1 1/2 Cup Buttermilk
2 Tbs Unsalted Butter, melted

Heat pan on medium high*, and heat the oven to 250 to keep the pancakes warm.

Whisk the flour, baking powder, baking soda, salt, and sugar in a medium bowl. Add egg, buttermilk using the whisk. Be careful not to over mix the batter, it should be lumpy.

Once the pan is hot, baste the bottom of the pan with some of the melted butter with a pastry brush. Using a 1/2 cup scoop, our the pancake batter into the pan - my pan was large enough to do three small pancakes at a time. Flip the pancakes when the pancakes bubble, and are slightly dry around the edges. Cook until golden brown.

As you’re working in batches, keep the finished pancakes on a oven-proof plate in the oven to stay warm while you’re finishing the rest of the pancakes.

*I use the pancake method a la Smitten Kitchen.

Read more...

And the Winner Is...

>> April 1, 2011

Josh and I decided to head to the Big Apple for a few days during his spring break. New York is one of our most favorite cities, and it’s been a few years since we’ve been there together. Over the past several years I’ve seen loads of magazine articles, blog posts, and TV shows about cupcakes and I think it’s quite clear that the cupcake craze is in full swing. I originally had the idea to find the best cupcake in NYC a little over a year ago when I was heading to New York on a business trip. Fortunately for Josh, the trip was so short that I didn’t have time to visit all of the shops that planned to taste test.
Fast forward a year - and here I am writing about the past several calorie filled days. Over the past two days I have managed to eat nine cupcakes from various establishments around the city. Nine cupcakes (especially spread out over 48 hrs) doesn’t sound like a lot as I’m typing this out, but rest assured my belly is full and my pants are feeling the pain. Josh and I schlepped around the island of Manhattan and have finally found (in my humble opinion) the best cupcake in all of New York.
#10
As someone who loves to bake, I really hate to say this - but Buttercup Bakery boasted the worst cupcake that I’ve eaten in quite some time. I sampled what I thought was going to be a home run - the Devil Dog cupcake. I mean, what could go wrong?
   Buttercup Bakery - Devil Dog Cupcake    Buttercup Bakery - Devil Dog Cupcake
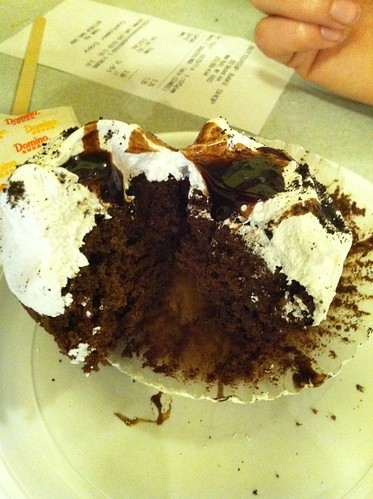
The cake was overly dry but was very chocolatey. The frosting was super sugary and oddly was not very marshmallowy. The cupcakes had a good cake-to-frosting ratio, and were a good size.
#9
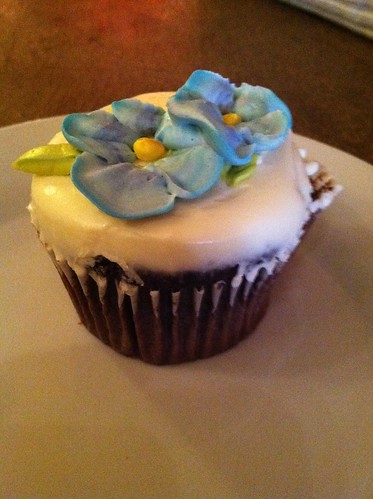
Simple and cute little bake shop - much like several other shops that we visited this past week. The atmosphere was bright, and simple with two small tables to sit and enjoy the cupcake and watch the passerby’s.

   Billy's Bakery - Red Velvet         Billy's Bakery - Red Velvet
I sampled the red velvet with cream cheese frosting. I may be somewhat of a red velvet snob being that I’m from the South, but I have to say that I wasn’t thrilled with the flavor of the cake. Red Velvet is supposed to have a chocolate flavor with a bright red color. While the color was spot on, I cannot say the same for the flavor. The cake was quite dry (which seems like a theme for most NYC cupcakes) and was completely lacking of the chocolate flavor. 
The cream cheese frosting was quite sweet, but wasn’t very cream cheesy. The cream cheese to powdered sugar ratio was off for my tastes, but was in it’s own sense still tasty.
#8
I sampled the vanilla w. strawberry icing. The vanilla cake was dense and somewhat dry, but not overly sweet. The strawberry icing was too sweet and and must have been made in the early morning, because there was a significant crust on the surface of the icing which generally comes from age....must like the rest of us I presume.
**for the record, I ate this a year ago on my afore-mentioned business trip. It was the only cupcake that I was able to sample on my trip.
#7
I have to say I was pretty jazzed about this one. Sweet Revenge was recommended to me by a friend who saw a feature on Food Network. 

 Sweet Revenge - Pure      Sweet Revenge - Pure      Sweet Revenge - Pure


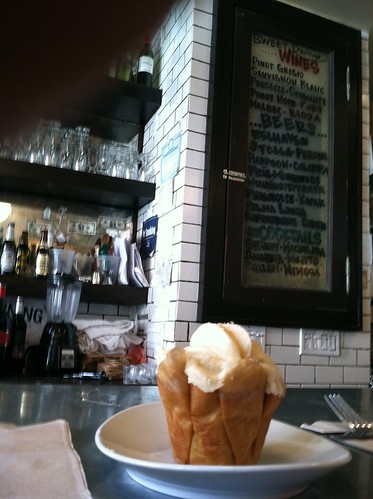
I opted for the “Pure” cupcake, which is Mexican vanilla cake with Mexican vanilla frosting. The cake was crazy dense, it was definitely the densest (is that a word?) cake that we had on our trip. It was more like pound cake than a traditional cupcake and tasted great by itself. The frosting was too sweet, and the cake to frosting ratio was off - there was too much frosting, especially with the cake’s signature mohawk.
#6
Tribeca Treats was our first planned stop on the long awaited cupcake tour. TT had a super cute shop, it was bright and airy and plenty of seating room.
  Tribeca Treats - Chocolate Cupcake      Tribeca Treats - Chocolate Cupcake      Tribeca Treats - Chocolate Cupcake


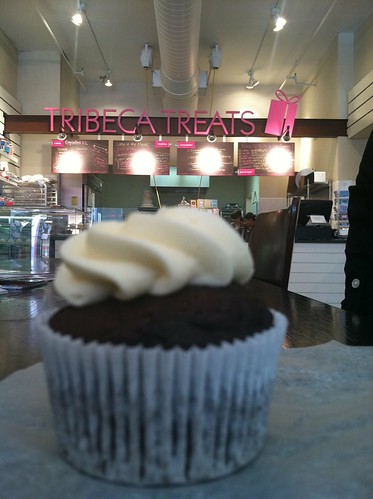
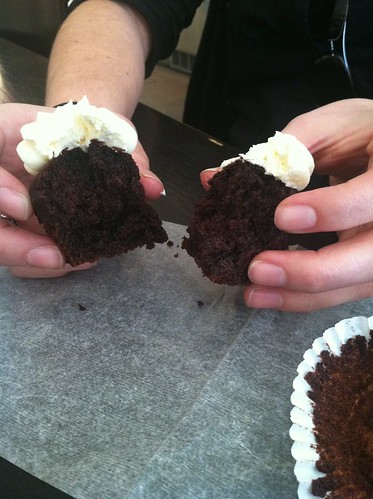
We tasted the chocolate cupcake with vanilla buttercream frosting. I hoped that the cake would be a bit more chocolatey, but it did have a nice texture. The texture was much lighter than most of the cakes that we tried which I much enjoyed. The frosting had a nice vanilla flavor, but had a slight grainy texture.
#5
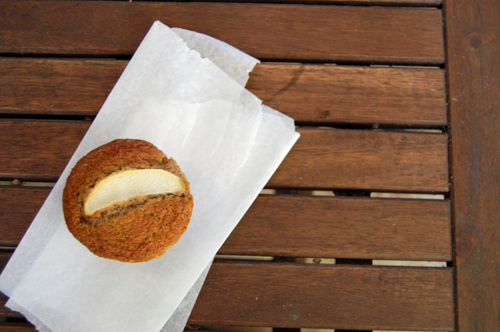
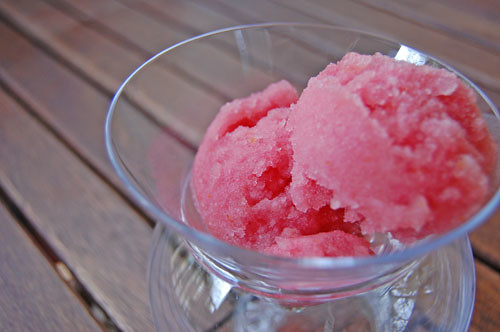
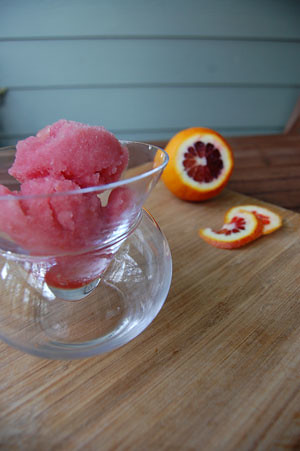
This was the second impromptu stop on the cupcake crawl. We stopped for brunch in Chelsea market and saw this adorable shop while we were there. The staff was great, and they proceeded to tell me that the cupcakes were going to change my life!

   Elini's - Raspberry Cupcake         Elini's - Raspberry Cupcake


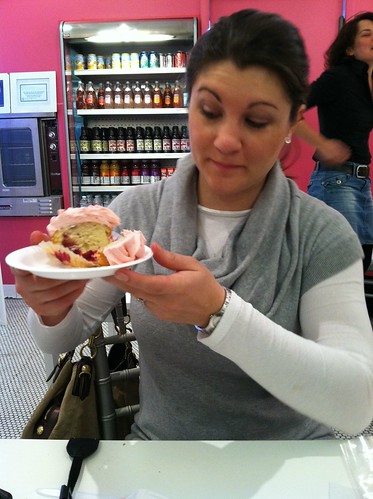
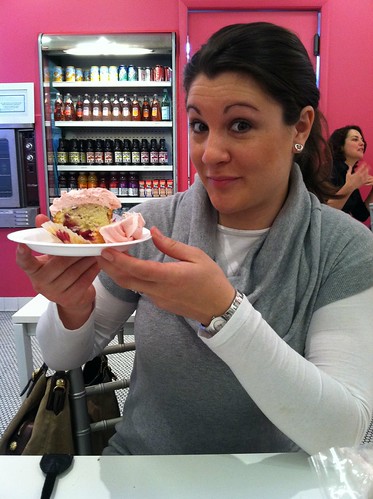
We ate the raspberry cupcake with raspberry buttercream frosting. The cake had a great texture, it was actually a vanilla cake with whole raspberries baked in. The raspberries gave the cake a nice sweet and tart flavor. The buttercream was tasty, but neither of us were able to find the raspberry flavor in the frosting. While it wasn’t exactly life changing, the cupcake was very tasty!
*ps - please excuse the weird face.
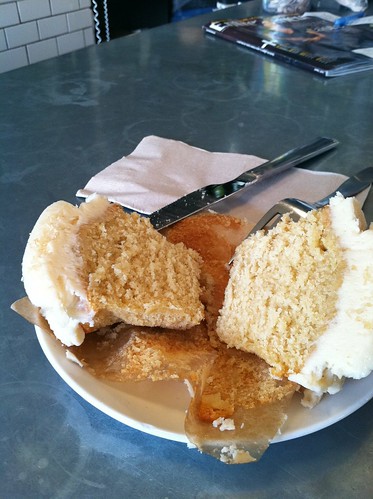
#4
This was the biggest surprise of all. The shop was a little hidden from the street, and was very dark inside. The entrance has a cashier and an espresso machine, and the cupcake case is actually towards the back of the cafe.

Cupcake Cafe - Chocolate Cupcake


Once we found the cupcake case, we tasted the chocolate cake with vanilla buttercream frosting. While the cake was very dense and a little on the hard side, the frosting was the best buttercream that we had on the whole trip. The frosting was super light and very creamy - had a great texture and lovely clean flavor.
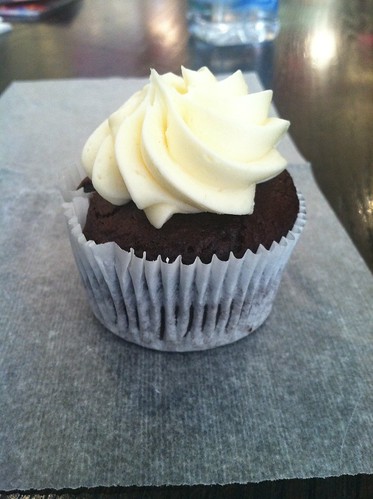
#3
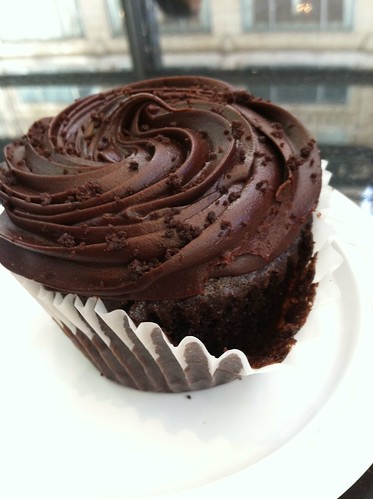
This was an impromptu cupcake tasting that we had a few hours after we arrived at the Dean & Deluca near our hotel. We stopped in for a cup of coffee and surprise...they had cupcakes!

Two Little Red Hens - Blackout Cupcake


I chose the blackout cake which was chocolate cake with chocolate frosting. This cake was super yummy and obviously very chocolatey. The cake to frosting ratio was great and the cake texture was great as well. The cake was very fudge-y and the frosting had an great creamy texture. This cake is certainly for the chocolate lover.
#2
It wouldn’t be appropriate to host a New York cupcake tour without stopping by Magnolia Bakery for a visit. The purist (and SATC fan) in me thought it only right to visit the Bleecker Street location all the way in the village. We arrived quite early because I know that the line to get into the bakery can be quite long, and thankfully there were only a few other patrons in the shop when we arrived - so no waiting for us!

 Magnolia - Vanilla Cupcake      Magnolia - Vanilla Cupcake      Magnolia - Vanilla Cupcake


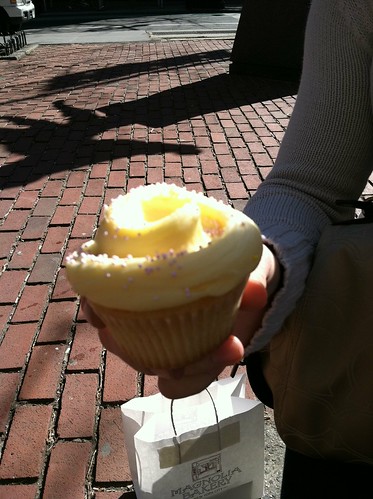
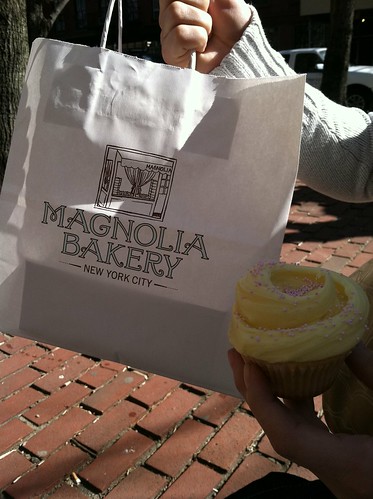
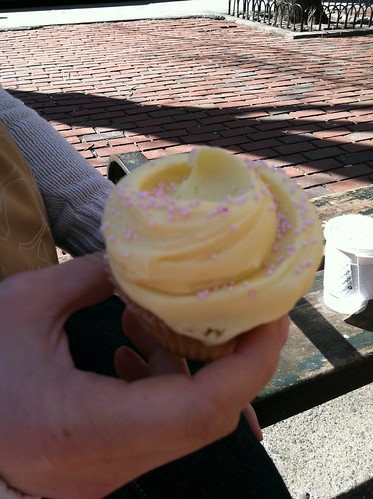
Oddly, I couldn’t decide which cupcake to choose - so I did what any girl would...I chose the prettiest. The prettiest happened to be vanilla cake with vanilla frosting. The cake texture seemed to be a bit of a hyrbid of the denser NYC cake and the lighter, airier cake that I prefer. The frosting was also quite tasty, but the cake to frosting ratio was way off. There was far too much frosting for the amount of cake in the cupcake.
#1
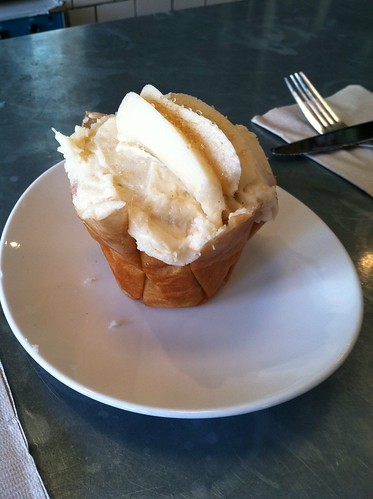
Butterlane was by far my favorite cupcake that we tried on our crawl. The shop although very small was very cute. We ate the cupcake at a small ledge that was along the wall of the shop.

 Butterlane - Espresso Cupcake      Butterlane - Espresso Cupcake      Butterlane - Espresso Cupcake


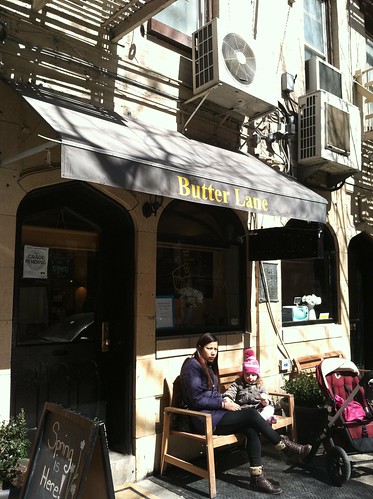
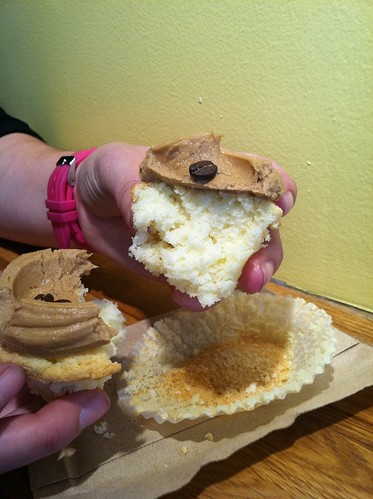
We sampled the vanilla cupcake with espresso frosting. The cake was the lightest, moistest cake that we had on the crawl and it had a great vanilla flavor. The frosting had a wonderful espresso flavor and also had a great creamy texture. The cake to frosting ratio was also spot on - such a great cupcake!


Read more...

Cleansed...Palate and All

>> March 23, 2011

Blood-Orange-Sorbet

Have you ever noticed that as a vacation begins to creep closer and closer, your daily life gets harder and harder? 

Why is this - so that the vacay seems that much more enjoyable?
Do you think the travel companies purposely make life harder right before you leave for a trip so that you like it that much more? That would make sense. Although if this were true, I think I should know about it because I work for a travel company. 
If this phenomena is real, then I’m in the throws of pre-vacay chaos. I’m convinced that my email volume has doubled and I’m in more meetings lately, while time has not increased - it in fact has shrunk. Daylight Savings time kills me every single time...never fails. At any rate, vacation is looming and I couldn’t be more thrilled!

Blood-Orange-Sorbet(2)

Amongst all of the recent chaos I’ve noticed that the weather continues to warm up each and every day, I find that I’m increasingly being drawn to sorbet’s, and granita’s...anything that’s cool, light, and refreshing.
I’ve made several different flavors of ice cream’s in the past, but this was my first attempt at a sorbet. Originally I intended to make a lime sorbet, but got all the way to the farmer’s market and lo and behold - there are no limes. Not sure how that happens, but my plan was instantly thwarted.

Blood-Orange-Sorbet(3)

I landed on blood oranges as a substitute because I’m so intrigued by them. They’re so bright and sweet, and I find them to be so beautiful. I absolutely love cutting them open and exposing their red interior which is such a stark contrast from their bright orange outer exterior.

Blood-Orange-Sorbet(4)


On the whole, the sorbet turned out to be quite lovely. It has a great texture, and bright refreshing flavor. I’m excited to explore different flavor variations and combinations in the future!
Blood Orange Sorbet
2 Blood Oranges (zest of)
3 Blood Oranges (juice of)
2 Cups of Simple Syrup*
1 Cup of Water
3 Tbs Vodka or Gin (optional - though this helps with the texture)
Zest the two oranges, and then finely chop the zest and set aside. Juice the 3 oranges, and pour the juice through a mesh strainer to remove any pulp that may be floating around. 
Combine the juice, zest, simple syrup, water, and gin or vodka (I used vodka). Refrigerate until the mixture is completely cool - then transfer the blood orange mixture to an ice cream freezer, and freeze according to the ice cream maker’s instructions. Once the ice cream maker is finished, transfer the sorbet to a plastic container and freeze so that the sorbet firms up completely. 
*Simple Syrup: 1 Cup Water, and 1 Cup Sugar - stir until dissolved, boil, and let cool. I felt that the sorbet was a bit too sweet. The next time I make this I’ll pull back on the sugar.

Read more...

  © Blogger template Simple n' Sweet by Ourblogtemplates.com 2009

Back to TOP