Follow my blog with Bloglovin

Clammy-Clam-Clams

>> March 20, 2011


This dish was a fantastic end to an amazing weekend! The weather was beautiful, and Saturday was one of the hottest days that we’ve had lately. Josh had board exams Saturday morning, so I had the first half of the day to myself! I decided to do it up right, and spend some me time at the spa! It was amazing! We finished the day with a run by the river and wings at Taco Mac - hello awesome day!
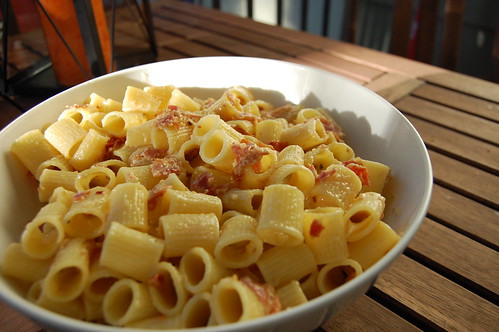
I had dinner at my Aunt’s house a few weeks ago and she served traditional Linguini & Clams and I remembered how much I love this dish! It’s such a classic and the simplicity of the dish is so refreshing. 


I couldn’t find a recipe that I was completely happy with, so I decided to do a hybrid of several recipes that I found. I also opted for a whole wheat linguini because, well ya know - that whole health kick thing.


So without further adieu: 
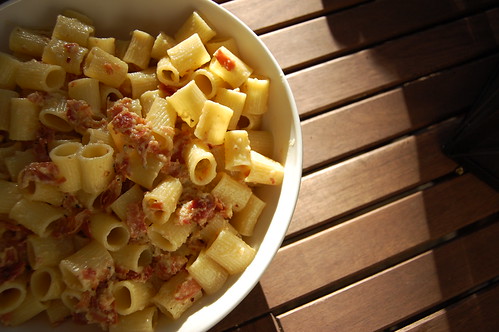
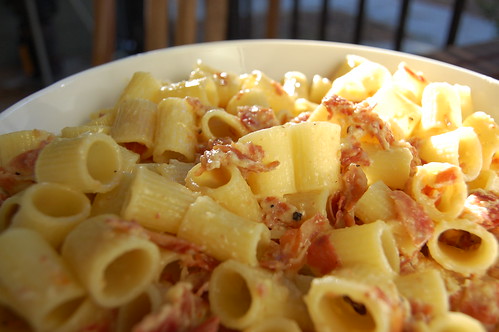
Linguine & Clams
1 lb Whole Wheat Linguini
2 lbs Fresh Little Neck Clams, cleaned and scrubbed of excess dirt
2 Tbs Olive Oil + Extra for drizzling
6 cloves Garlic, crushed or minced
1 tsp Crushed Red Pepper
1.5 cups White Wine
2 Tbs Lemon Juice
Fresh Flat Leaf Parsley, chopped
In a large pot of boiling salted water, cook the linguini until just al dente, then drain the pasta well.
While the pasta is boiling, heat the olive oil in a large pot or dutch oven. Add the garlic and cook until almost browned, then add the crushed red pepper and cook for another minute. Add the wine and scrape up any browned bits, and bring to a simmer. Add the clams and cover while the wine mixture is simmering. Cook until the clams have opened, 5 - 9 minutes and discard any clams that don’t open.
Toss the linguini, the clams, and the cooking liquid together. Squeeze lemon juice over the pasta and toss  with flat leaf parsley for garnish; season with salt and pepper as needed.
If the pasta seems dry or sticky, toss with reserved pasta water and/or olive oil.

Read more...

Slightly Whole Wheat Banana Oatmeal Healthy-ish Bread

>> March 19, 2011

banana bread
Yikes! That title is a mouthful, no? But have no fear - the recipe is crazy easy to make.

I’ve been trying to clean up my act lately, like my whole act. I’ve been working on working out, eating healthier, hydrating more, and staying well rested. You could say this is a better-late-than-never New Year’s resolution of sorts.
I’ve gotten the inkling to change some things up because I have a several friends who overhauled their lives and are reaping the bountiful rewards. I dig rewards, especially the skinny kind.
banana bread

My diet overhaul has mainly centered around journaling and planning ahead for each meal/snack that I have throughout the day. In the past I’ve planned dinner for the week ahead of time and have largely left lunch to whatever fast food tickles my fancy (no bueno), and as for breakfast...we’re just now getting reacquainted, it’s been a few years.

While planning meals for the next week, I remembered a pretty tasty banana bread recipe that also happens to be one of Josh’s fav’s! Score!

I tend to shy away from baking bread for several reasons:
  1. bread is scary
  2. my oven isn’t that reliable
  3. breads take FOR-EV-ER to make
  4. they’re messy
  5. oh, and one last thing - bread is scary.
Not to worry, this is a simple quick bread recipe that I modified to healthi-fy it up a little bit. And it’s super delectable!
Banana Bread

Slightly Whole Wheat Banana Oatmeal Healthy-ish Bread
adapted from heatherhalesdesigns

1 cup Whole Wheat Flour
1/2 cup All Purpose Flour
1 1/2 tsp Baking Powder
1/4 tsp Baking Soda
1/2 tsp Ground Cinnamon
1/2 cup Sugar
1 Egg, beaten
3 Whole Bananas, smashed (very ripe)
1/4 cup Canola Oil
1/2 cup Old Fashioned Oats (plus more for sprinkling)
1/4 cup Unsweetened Applesauce

Combine dry ingredients together in large mixing bowl. Combine all of the wet ingredients, including the banana into a smaller mixing bowl and gently stir to combine. Add the wet ingredients to the dry ingredients and gently stir until just until the mixture becomes uniform.

Pour into a greased 9x5x3 loaf pan, and sprinkle with a few oats.

Bake at 350 for 50 minutes

Read more...

Carbonara

>> October 20, 2010

DSC_0087

I can not even begin to explain the depths of my love for this dish. I really can’t. So I won’t.

I’ve been making this dish for several years, and have had the pleasure of sampling assorted versions at acclaimed establishments around the country and even in the motherland. And guess what – I’ve loved it every single time. It goes without saying that the version I devoured in Italy was the best pasta dish on the face of this ever loving planet – but we won’t delve into that because I’ll start to get depressed and spend far too much money on a last minute flight to Rome.

DSC_0091

I mean, there are few better things in life besides carbonara. Right? It’s the best marriage of supremely fantastic ingredients, ie: pasta (duh), bacon, egg, and cheese…oh and let’s not forget the wine.

DSC_0093

This recipe originally came from food network, but I have since tweaked it as I’ve discovered variations of how to combine the ingredients and have ended on a version that tickles my fancy.

CarbonaraAdapted liberally from the Food Network

1 lb Pasta (I like Rigatoni)
1/3 lb pancetta, chopped
2 Tbs Olive Oil
4 cloves of Garlic, minced
¼ tsp crushed red pepper
½ dry white wine
3 large eggs: 1 whole, and 2 yolks
1/3 cup grated Parmigiano Reggiano

Place a large pot of water over high heat and bring to a boil. When the water has reached a rolling boil, add salt and pasta and cook to al dente.

While the pasta cooks, cook the chopped pancetta and olive oil until the pancetta is crispy 3 to 5 minutes. Add the garlic and crushed red pepper – sauté for two minutes or until garlic is browned. Add wine to the pan and scrape up the brown bits on the bottom of the pan. Cook and allow the wine to reduce by half.

Mix together the two egg yolks, whole egg, cheese (for the love of all things sacred, please don’t use the white saw dust in the green can), and freshly cracked black pepper into a paste and set aside.

Once the pasta is cooked, drain the pasta and add it to a large mixing bowl. Add the pancetta/garlic mixture to the pasta and toss until combined. Once combined, add the egg paste and toss quickly to combine. The heat from the pasta will cook the eggs, but you’ll need to toss rapidly in order to keep the egg from coagulating. The pasta should be coated in a creamy/cheese like sauce.

buon appetito!

Read more...

Pumpkin Whoopie Pies

>> October 11, 2010

Whoopie Pie


I swear it will never come (let’s all forget what I said last week). Fall is trying to elude us all…at least here in the South. Fall evokes different feelings for everyone. Some linger in the excitement of college football, some watch for changing colors and falling leaves, people like myself anticipate the new bounty that awaits us at the markets every week. The common ground that we all share is the enthusiasm for cooler temperatures! Georgia weather has been taunting its inhabitants for going on two weeks. It’s hot, then it’s cold, it’s hot, then it’s cold. Sheesh! Can I say enough already?

Pumpkins!


I wasn’t about to let the too high temperature, and by too high I mean 85 (which relative to the 100+ heat we saw this summer isn’t too bad) keep me away from the mountains of North Georgia and the masses of pumpkins that were ripe for the picking.

Pumpkins!


I love these little seasonal daytrips that we take. There’s nothing like scooting away to what seems like an entirely different state for a few hours to stretch our legs and breathe in the open air. The bonus for me is that I get to be the passenger and gaze at all of the foliage and the old vintage houses that sit along the state road the leads us up into the mountains.

Pumpkins!


Of course the very first thing one must do upon returning from such a trip is to immediately begin preparing the loot for the first delicacy of the season. Ok – I guess second after arranging the soon-to-be jack-o-lantern’s at the front door for all to be envious.

Whoopie Pie


My first pumpkin adventure of the season was to be pumpkin whoopie pies (actually made from store bought pumpkin bc we were home bound last week) because I could think of no better way to usher in the new season than with a cookie, that’s really a sandwich, that tastes like cake. It all makes perfect sense.

Whoopie Pie


Pumpkin Whoopie Pies
Martha Stewart

For the cookies
1 ¾ cups all-purpose flour
¾ cup unsweetened cocoa powder (not Dutch-process)
1 ½ tsp baking soda
½ tsp coarse salt
1 tbs unsalted butter, softened
¼ cup vegetable shortening
½ cup granulated sugar
½ cup packed dark-brown sugar
1 egg
1 cup milk
1 tsp pure vanilla extract

For the filling
4 oz cream cheese, at room temperature
½ cup (1 stick) unsalted butter, at room temperature
½ cup confectioners' sugar
¼ cup canned solid pack pumpkin
Pinch of cinnamon
Pinch of nutmeg

Prepare cookies: Preheat oven to 375 degrees. Sift together flour, cocoa powder, baking soda, and salt into a medium bowl; set aside.

Place butter, shortening, and sugars into the bowl of an electric mixer fitted with the paddle attachment. Mix on high speed until smooth, about 3 minutes. Add egg; mix until pale and fluffy, about 2 minutes. Mix in half the flour mixture, then the milk and vanilla. Mix in remaining flour mixture.

Drop about 2 teaspoons dough onto baking sheets lined with parchment paper, spacing 2 inches apart. Bake until cookies spring back when lightly touched, 12 to 14 minutes. Transfer baking sheets to wire racks and let cool 10 minutes. Remove cookies from baking sheets and transfer to wire racks using a spatula; let cool completely.

Prepare filling: In the bowl of a mixer fitted with the paddle attachment, whip together cream cheese, butter and confectioners' sugar on medium speed until smooth, about 3 minutes. Add pumpkin, cinnamon, and nutmeg; whip until smooth, scraping down the bowl as necessary.

Pipe or spoon about 2 teaspoons filling on the flat sides of half the cookies. Sandwich with remaining cookies, keeping the flat sides down.


Read more...

Hearty Chicken + Rice Soup

>> October 3, 2010

Hearty Chicken + Rice Soup


It’s finally fall! I’ve been dreaming of the beginnings of my favorite season when we began suffering 100+ degree weather combined with 100% humidity. It’s been a long time coming, and it’s finally here!

Autumn is my favorite season because of all of the beautiful foliage, hearty and warming meals, turtleneck sweaters, and let’s not forget…pumpkins! I’m so excited to decorate with fall colors, visit my favorite
pumpkin patch to pick out the perfect pumpkin, and drive through the apple orchards of North Georgia in search for the best candy apples ever invented!

With less than a week of lower temperatures under our belt, Josh has already succumbed to this year’s first flu and has been lying around the house for the past four days like a sad little mushroom. Unfortunately this has put a damper on our original plans to tromp through the North Georgia mountains – but not to worry, it’s already back on the calendar for next weekend!

Hearty Chicken + Rice Soup


Since Josh’s diet has consisted of jello cups and sprite for the past several days, I decided that it was high time for some real nutrition. After scouring the interwebs for a soothing soup, I settled on this chicken and rice soup. It’s simple enough, and I was actually surprised at how quickly it came together. I altered the original recipe slightly – and in my opinion for the better, but you judge for yourself!

Hearty Chicken + Rice Soup
Adapted from Bon Appetit circa 2000 via
Epicurious

6 cups of Chicken Broth
2 cups of Water
2 split Chicken Breasts (bone-in, skin-on)
2 whole Chicken Leg quarters (skin-on)
1 ½ Tbs Olive Oil
3 Carrots, sliced on the diagonal into ½ inch pieces (scrubbed, not peeled)
3 Celery Stalks, sliced on the diagonal into ½ inch pieces
1 Yellow Onion, diced
1 Bay Leaf

1 ½ cups uncooked long-grain white rice, rinsed*

Heat the Olive Oil in a large stock pot over medium high heat, and brown the chicken breasts (skin side down first) for three to four minutes on each side and set aside. Follow with browning the leg quarters (skin side down first) for three to four minutes on each side and set aside with the breasts.

While the chicken is browning, slice the Carrots, Celery, and Onion. After you’ve browned the chicken, add in the vegetables and cook over medium high heat for four to five minutes or until the onions are soft. While the vegetables are cooking, remove the skin and any excess fat from the chicken.

Once the Onions have softened, add the chicken back to the pot along with the Chicken Broth, Water, and Bay Leaf. Bring to a boil, and then simmer for 30 to 40 minutes until the chicken is cooked through. Every so often, check the soup and skim any foam that has accumulated on the top. Once the chicken is cooked through, remove and set aside to cool.

**This step can be skipped if you’re on a time crunch:
After the chicken has cooked through, turn off the heat and allow the soup to cool at room temperature. Place the entire pot into the refrigerator and cool the soup to the point that the fat solidifies on the top, remove the fat from the top of the soup and place over medium heat and bring back to a simmer.

Remove two cups of the stock and place in a medium saucepan, and bring to a boil. When at a boil, add in the rice and turn the heat down to a simmer. Stirring occasionally, cook the rice until tender (approx 15 – 20 min) and add back to the soup.

While the rice is cooking, pull the chicken from the bones and shred or slice into chunks according to your preference.

After the rice has cooked through, add the chicken and the rice back to the main pot with the vegetables.

Serve. And Enjoy!

**I suppose that you could use any rice, I used short grain because it’s what I had on hand.

Read more...

Icebox Cake

>> September 28, 2010

DSC_0067


Would you like to have a dessert that tastes like a perfectly milk laden oreo? In cake form? Oh, you would? Perfect – c’mon follow me! I’ll show you what bliss tastes like!

I was super excited when I ran across this recipe for the first time, and even more excited when my bestie harbored the same emotions for this super simple, super easy dessert that I did. What was our next step you ask? Why we had an
icebox cupcake making party – that’s what!

DSC_0066


After creating fantastic cupcakes, I decided to make the whole shah-bang for a dinner party that I was attending. It makes the perfect dessert for a summertime dinner party because its super easy and quick to make and to say it’s a crowd pleaser would be a bit of an understatement.

DSC_0065


The entire dessert is encompassed by layering paper thin chocolate wafers with delicately whipped (sometimes flavored) whipped cream. After marinating in the refrigerator for about an hour – the cake will emerge to be what icebox dreams are made of.

DSC_0075


Icebox Cake
3 cups of heavy cream
2 tbs. of sugar
2 tsp vanilla extract
2 – 9oz packages of
chocolate wafer cookies**

Pre-chill a metal or glass mixing bowl, and electric mixer beaters in the freezer for about 5 minutes. After 5 minutes in the freezer, pull out the bowl and beaters and whip the cream, sugar, and extract on high until soft peaks form.

On a cake plate, or large flat serving platter – arrange cookies side by side in a circle while keeping one cookie in the middle.

Spread ½ cup of whipped cream on top of the cookies and spread all the way to the outer edge of the wafers. Repeat with the remaining cookies and cream until all are used.

**you can find the chocolate wafers at various super markets, but they're usually in the ice cream or candy section. Not the cookie section...which would actually make more sense, but who am I?

Read more...

lions, tigers, and...zebras? oh my!

>> September 19, 2010

So these past few months have been crazy ridiculous! I mean the last time I was here it was July – I’ve barely looked up at the calendar long enough to realize that September is officially on its way out! I mean where did my summer go?

We’ve been super packed this summer, what with chasing Josh around his triathlons, visiting my parents, business trips, visiting Josh’s parents, wine parties, getting a new job (score!), school, work, dogs, and the rest of life I’ve clearly not found the time to update! Gah – I hate it when I do that!

Either way, I think this is the perfect opportunity to jump back into the swing of things. A few weeks ago a friend of ours mentioned that she was going to be having a birthday shindig. About a week before the party, we found out that she had planned to make her own birthday cake for the party – and well we all know that can’t happen. So I decided to embark on an endeavor to make her 25th birthday cake and my first ever fondant covered, tiered cake!

After researching the heck out of fondant and anything else involving sugar, flour, eggs, and butter I decided to make a two tiered red velvet cake with cream cheese frosting covered in my very own marshmallow fondant.

I was super nervous about working with fondant – but it truly wasn’t as difficult as I thought it was going to be. Sure there were hang-ups, er I guess wrinkles, but all in all I felt pretty good about the final product! I’m definitely excited about my next go-round with the stuff – now I just have to decide what to make next!!

So, without further adieu - I give you my first fondant experience!


lions, tigers, and...zebras? oh my!


Red Velvet Cake


Adapted from Magnolia Bakery


3 1/3 c. cake flour
¾ c. unsalted butter, softened
2 ¼ c. sugar
3 large eggs, at room temperature
3 tbs red food coloring**
3 tbs unsweetened cocoa
1 ½ tsp vanilla extract
1 ½ tsp salt
1 ½ c. buttermilk
1 ½ tsp cider vinegar
1 ½ tsp baking soda

Preheat oven to 350 degrees.

Grease and lightly flour three 9x2 in round cake pans, then line the bottoms with wax paper (I used parchment paper because I had it on hand, and it’s what I generally use for baking).

To make the cake: in a small bowl, sift the cake flour and set aside. In a large bowl, cream the butter and sugar until they are very light and fluffy, about 5 minutes. Add the eggs, one at a time, beating well and scraping the bowl after each addition.

In a small bowl, whisk together the red food coloring, cocoa, and vanilla. Add to the batter and beat well.

In a measuring cup, stir the salt into the buttermilk. Add to the batter in the three parts, alternating with the flour – make sure to begin and end with liquid. With each addition, beat until the ingredients are incorporated, but do not overbeat.

In a small bowl, stir together the cider vinegar and baking soda (watch for bubbles!). Add to the batter and mix well. Using a rubber spatula, scrape down the batter in the bowl, making sure the ingredients are well blended and the batter is smooth.

Divide the batter among the prepared pans. Bake for 30 – 40 minutes (mine baked for closer to 40), or until a cake tester inserted in the center of the cake comes out clean. Let the layers cool in the pans for 1 hour. Remove from the pans and cool completely on a wire rack.


Cream Cheese Frosting


from Smitten Kitchen


8 oz cream cheese, at room temperature
½ c butter, at room temperature
3 c confectioner’s sugar, sifted
1 tsp pure vanilla extract

Place cream cheese and butter in a medium bowl. With a mixer, beat until light and fluffy, about 2 minutes. Add sugar and vanilla. Beat, on low speed to combine.

Read more...

  © Blogger template Simple n' Sweet by Ourblogtemplates.com 2009

Back to TOP